Some Euro bikes are coming in with very restrictive airboxes due to EU noise laws. This reduces induction noise but also robs the engine of air for combustion.
A few bikes are quite bad and get a large power boost simply by opening up the airbox, including the Husqvarnas and Hondas. It is a simple job and, if done right, can look fancy and stylish.
WARNING!
Opening up your airbox as shown here may require adjustment to your jetting or ECU
Step 1 DECIDE WHERE
Take particular care in deciding where you want to mount these holes. Once your drill through the side panel then you may also need to drill through the air box or cut the sides out of the airbox to allow the air to breathe all the way to the air filter. This is the case on all Honda’s.
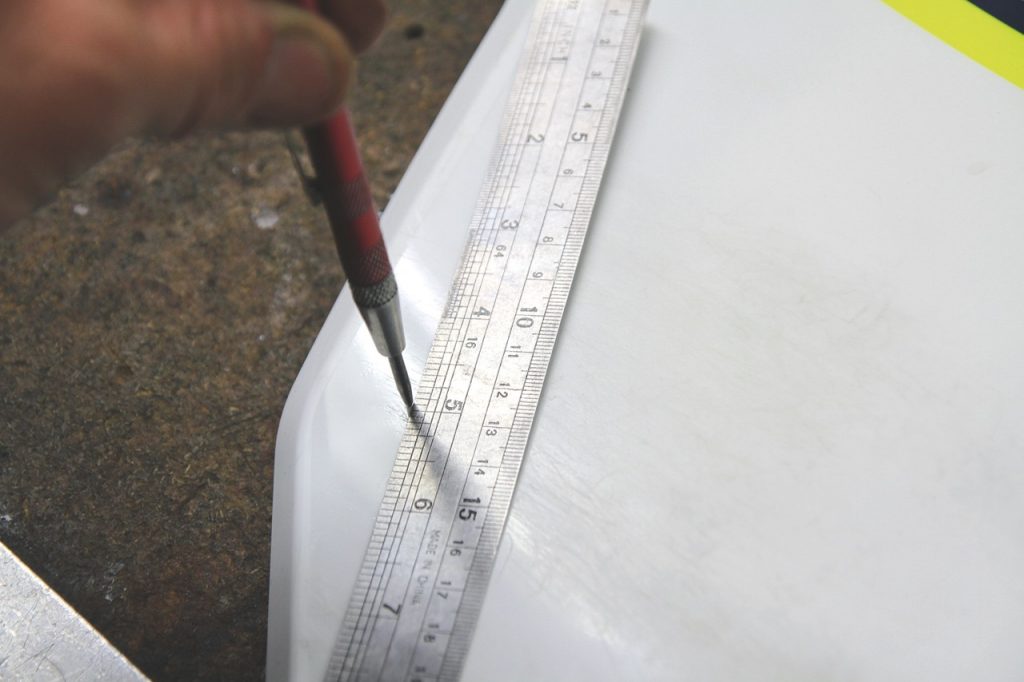
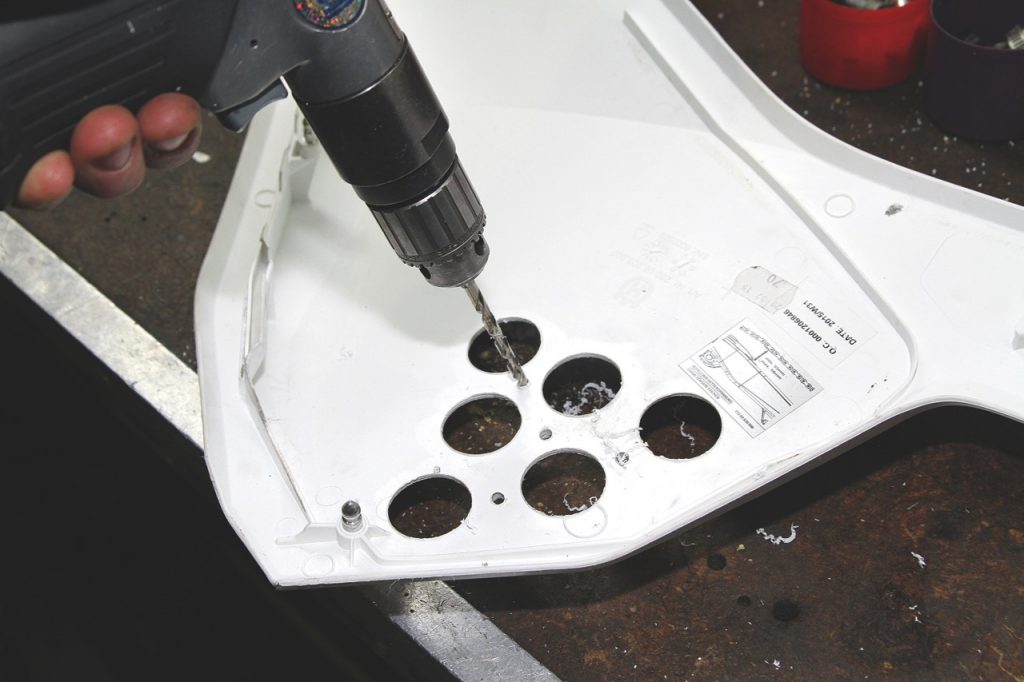
Step 2 CENTRE PUNCH
Mark out your holes and centre punch where you are to drill. Make sure you use a ruler and keep the hole pattern symmetrical so it looks neat.
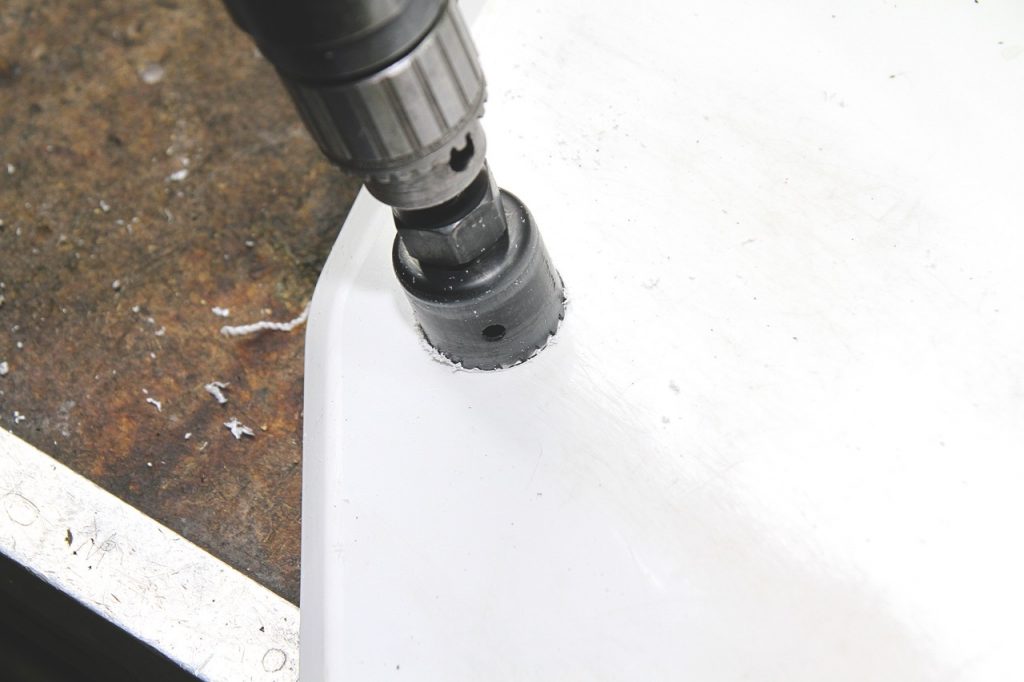
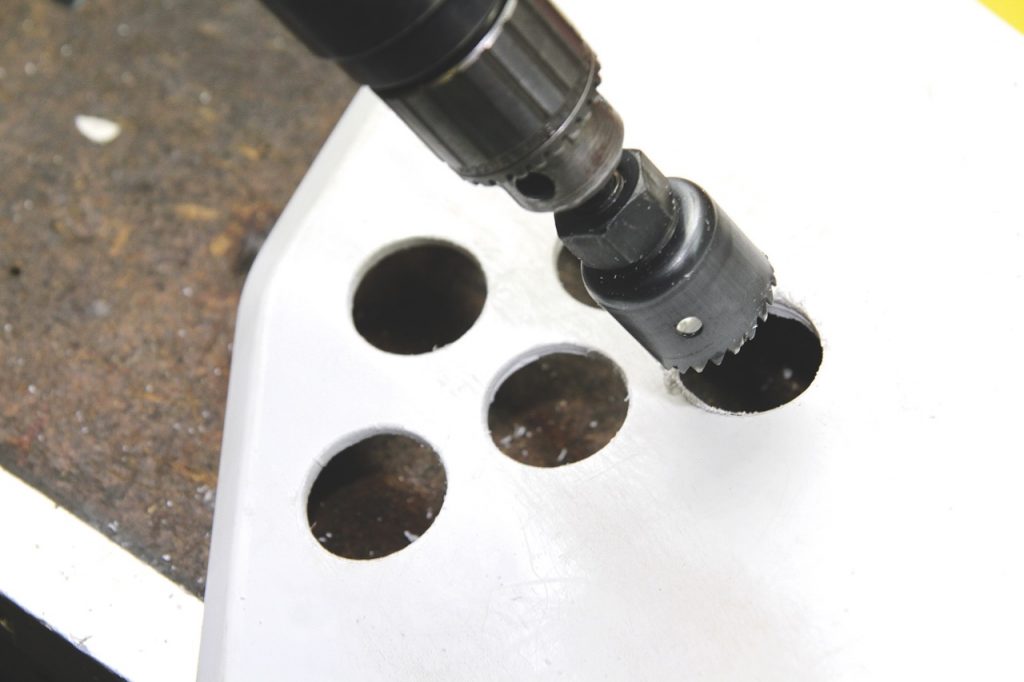
Step 3 DRILL AWAY
Drill the holes to the size you are after. Remember a few large holes will breathe much better than many small ones.
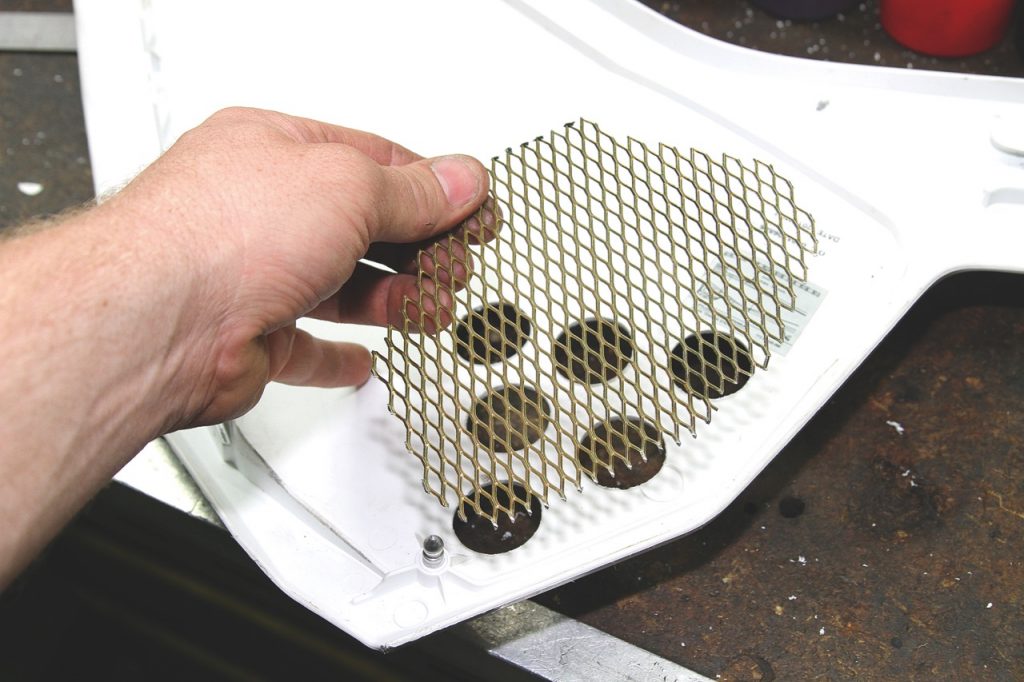
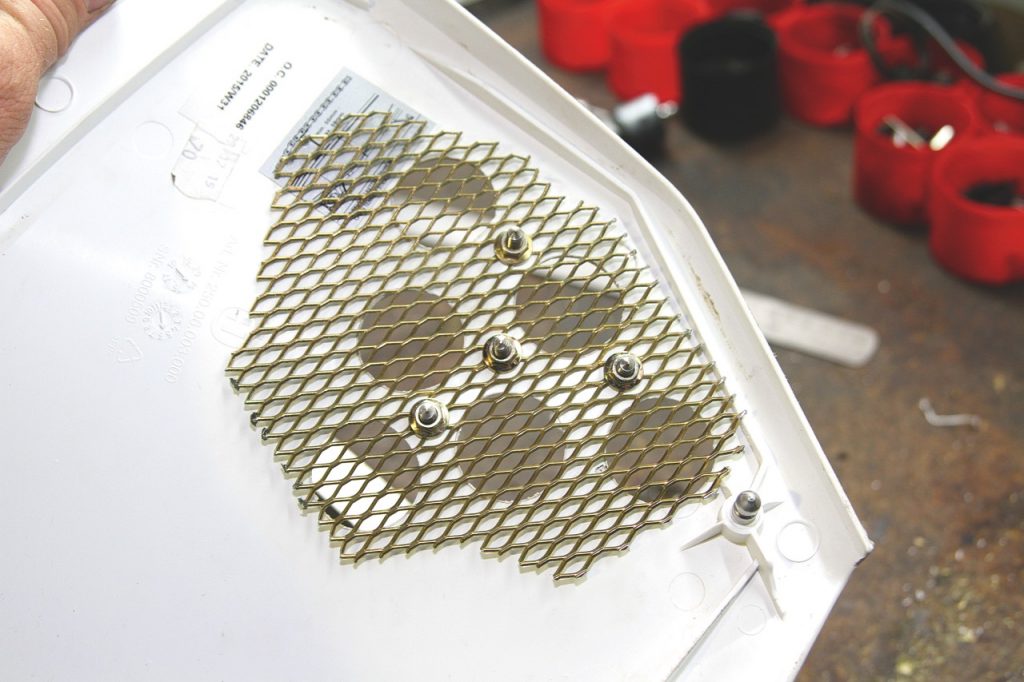
Step 4 CHOOSE MESH
Clean up any swarf or dags on the plastics with a razor blade and choose a piece of mesh your wish to mount behind the holes.
Step 5 CUT THE MESH
Cut the mesh to the size and shape you need to neatly mount behind the air holes. This piece of mesh should be large enough to not restrict the air flow but should stop rocks or large amounts of dirt from entering the airbox.
Step 6 BOLT HOLES
Mark and drill the holes for the bolts or rivets that you will use to hold the mesh in place. Try to maintain the pattern you have used for the air holes.
Step 7 CHOOSE GOOD BOLTS
If you are using bolts to secure the mesh, use button heads so you pants or boots don’t get caught on them while riding.
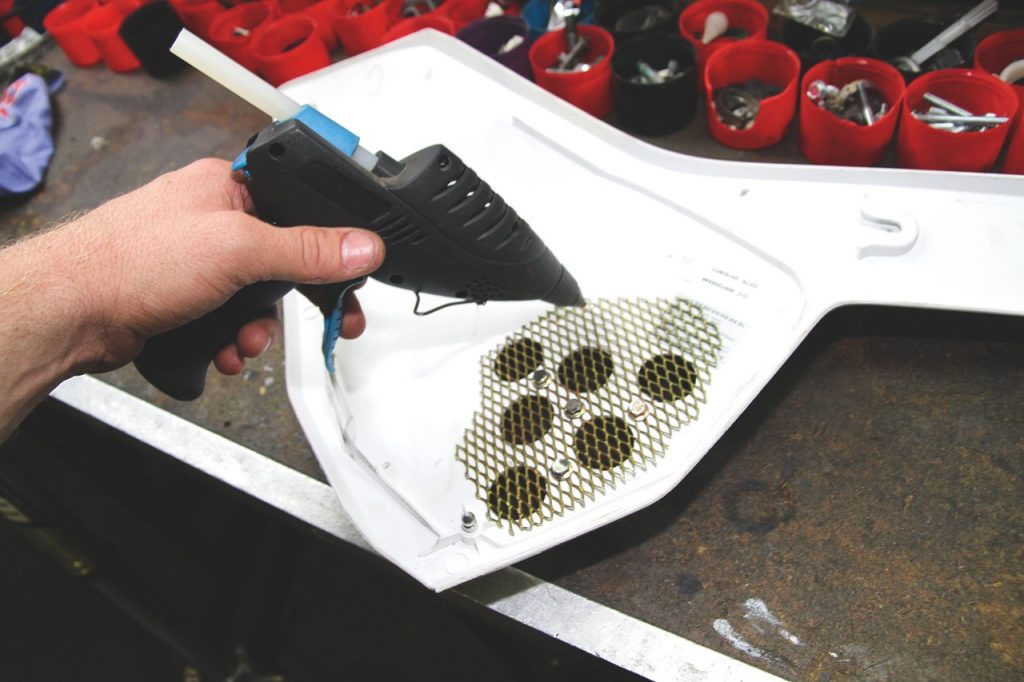
Step 8 GLUE THE MESH
Using a hot-glue gun, place a nice, thick bead of glue around the edges of the mesh. This will keep the edges nice and tidy and stop things like cleaning rags getting caught on the sharp edges, as well as helping to keep the mesh in place.
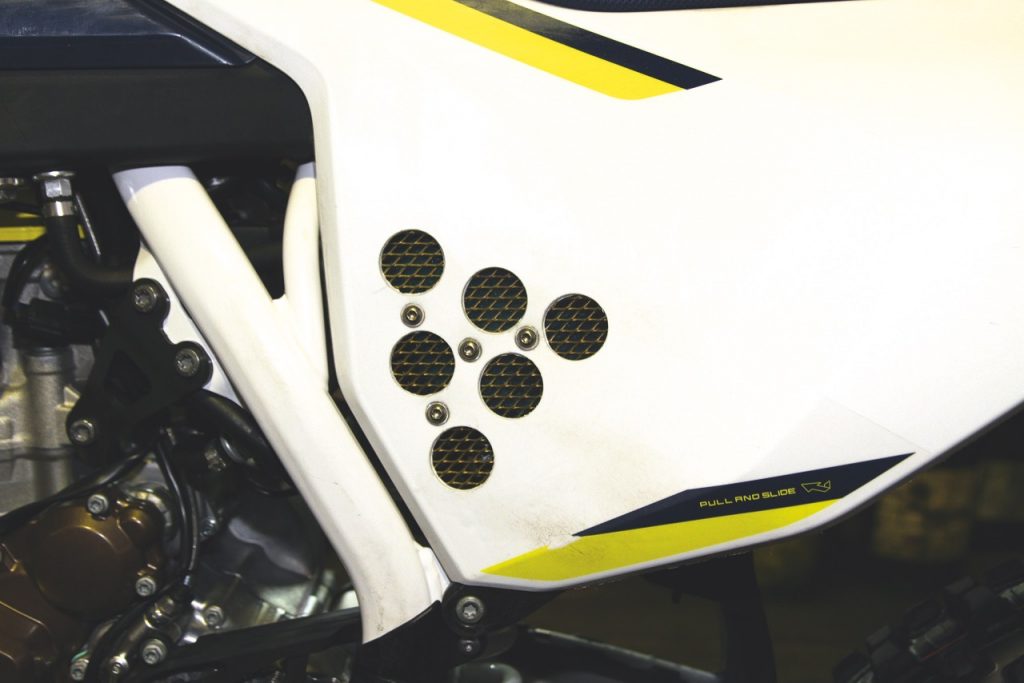
Step 9 FEEL THE POWR
Fit the side panels back to the bike and go for a ride.
Dos
- Use mesh with holes large enough to not restrict air flow.
- Use button-head bolts so they don’t get caught on your boots or clothes.
- Secure the edges of the mesh with hot glue to prevent it from lifting up.
- Follow a pattern to keep the holes looking neat and tidy
- Measure out and mark your holes before making any drillings
Don’ts
- Use any blunt drill bits
- Drill any holes without centre punching the holes first
- Spin the drill bits to fast or they can melt the plastic and distort the holes
- Over tighten the bolts holding the mesh in place
- Drill any holes with the plastics still fitted to the bike
Mat Boyd