Step 1: Just the sight of these handlebar-twisting, tyre grip-destroying, sphincter-puckering bits of tree is enough to freak a trailrider. Riding over them standing up is the go, but before you get to that stage, try this technique which relies on rider weighting, momentum and your hooves. You can get all flashy and stand up once you feel good picking your way through.
Step 2: Riding is looking – and in this case, you are looking far enough ahead to give yourself time to prepare. Once you have seen them, you can drop to a comfortable speed (not too slow, you need momentum to get over them) and sit down in preparation.
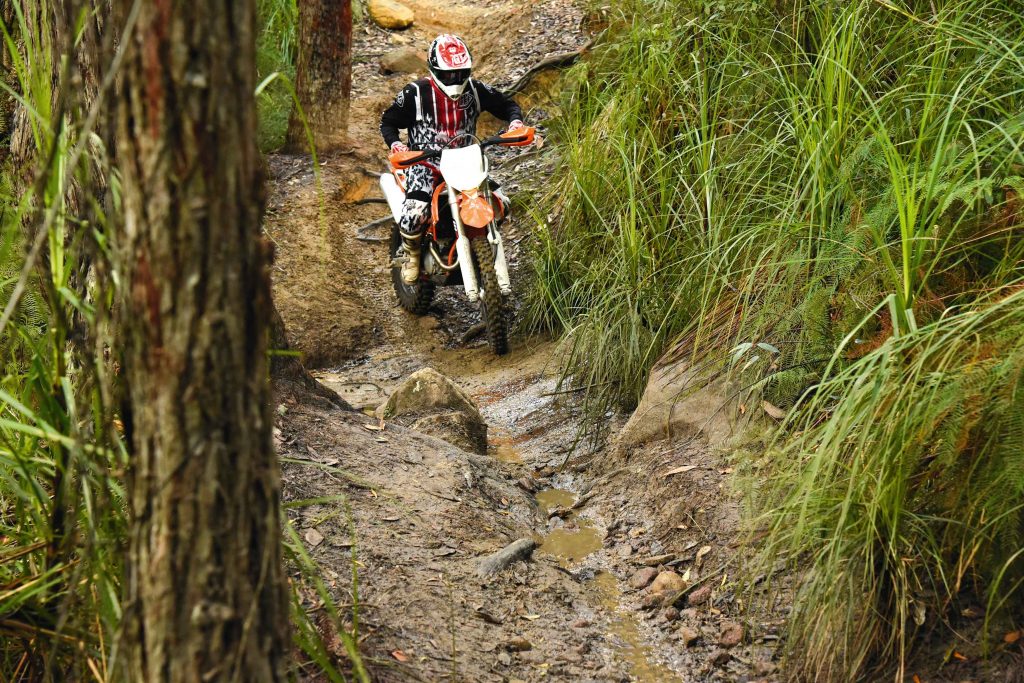
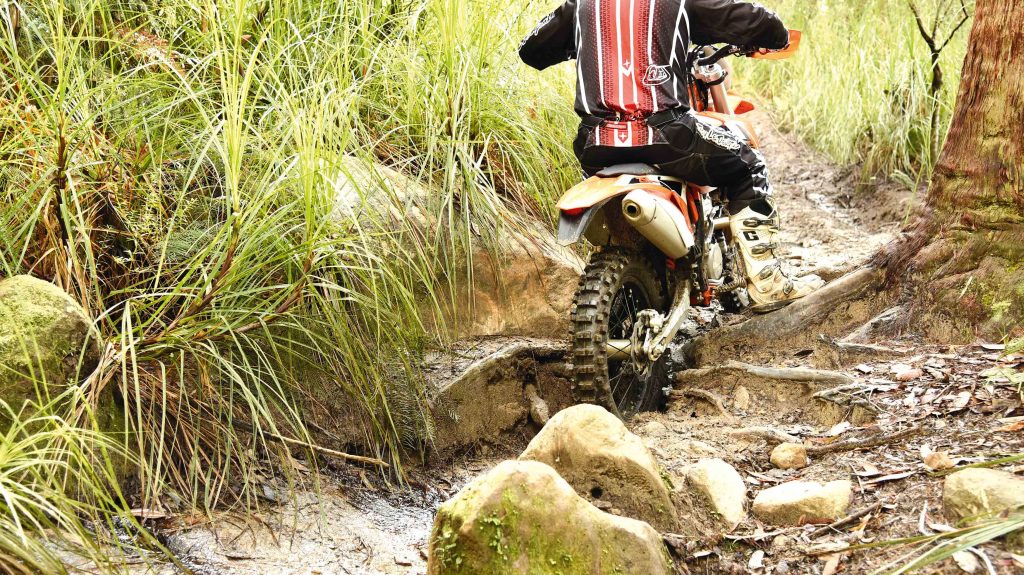
Step 3: Line up the lowest point of the root spaghetti and aim your front wheel at it. You need to be driving the bike forward with the throttle and clutch (see step 4), looking at where you want to go (the other side of the roots!) and keeping your head up for balance. You can also paddle with your legs – just get them ahead of the bike, rather than dragging them behind it, and don’t lift your weight off the seat.
Step 4: It’s about here that bikes explode into wheelspin, come to a grinding halt and the riders in front get away while the riders behind start throwing rocks at you. Unless… unless you use your clutch and throttle to keep the rear wheel driving quietly over the roots – use the torque, not the high-rev power. You need to drive onto the roots with momentum, so keep that momentum going with well-timed throttle and clutch. Don’t stop just before the roots or hesitate – just line them up, drive with the throttle and keep it smooth with the clutch!
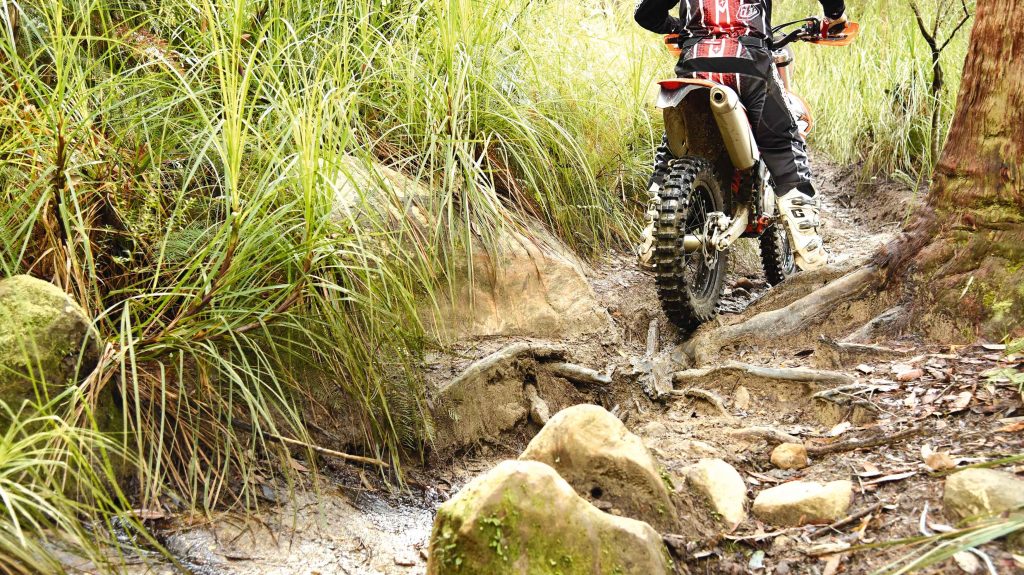
Step 5: Its important to keep your weight on the rear wheel for traction, but not so far back you can’t steer the bike. While I am using my legs here, I am also keeping the rear suspension loaded to keep the tyre gripping. Remember, you don’t want to stop – you must keep momentum, grip and steering!
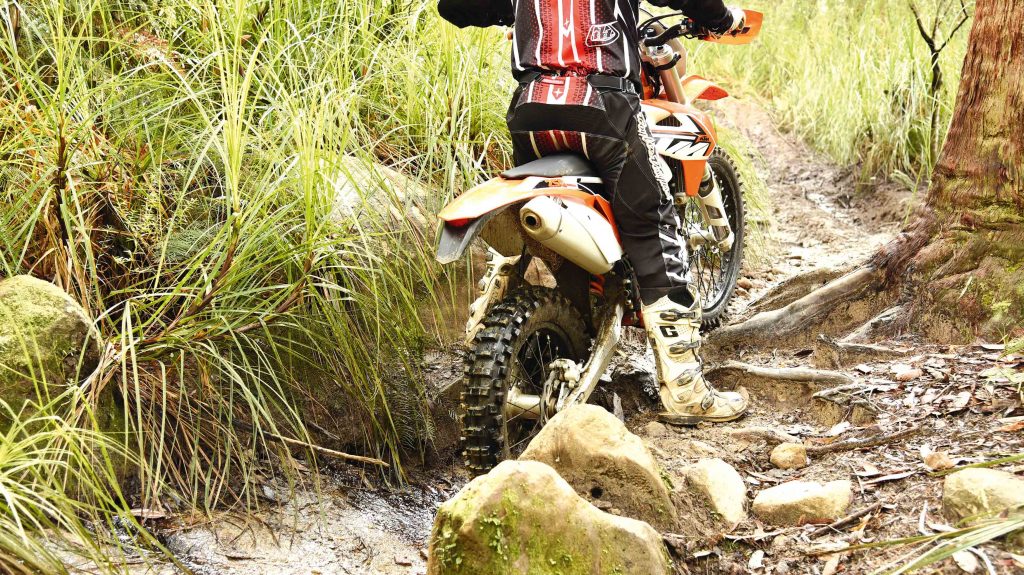
Step 6: Your momentum has allowed the rear wheel to keep driving, keeping the weight on the rear spring has allowed the tyre to maintain grip, your hooves have given you confidence to stay upright and your head is up, planning your line and helping you decide when to stand up again. This technique works for small logs, crossing ruts, etc, too.
Why we sit down
The reason we sit down is to keep the shock loaded – pogoing it by putting your feet down will unweight the rear, confusing the bike and the rider and ending in tears. For this technique, stay seated to maintain constant traction, just using the feet as guides, rather than taking too much of your weight off the shock. Then you can start developing the same technique, but standing on the footpegs for an even smoother, cooler-looking ride.
WEAR FACTOR
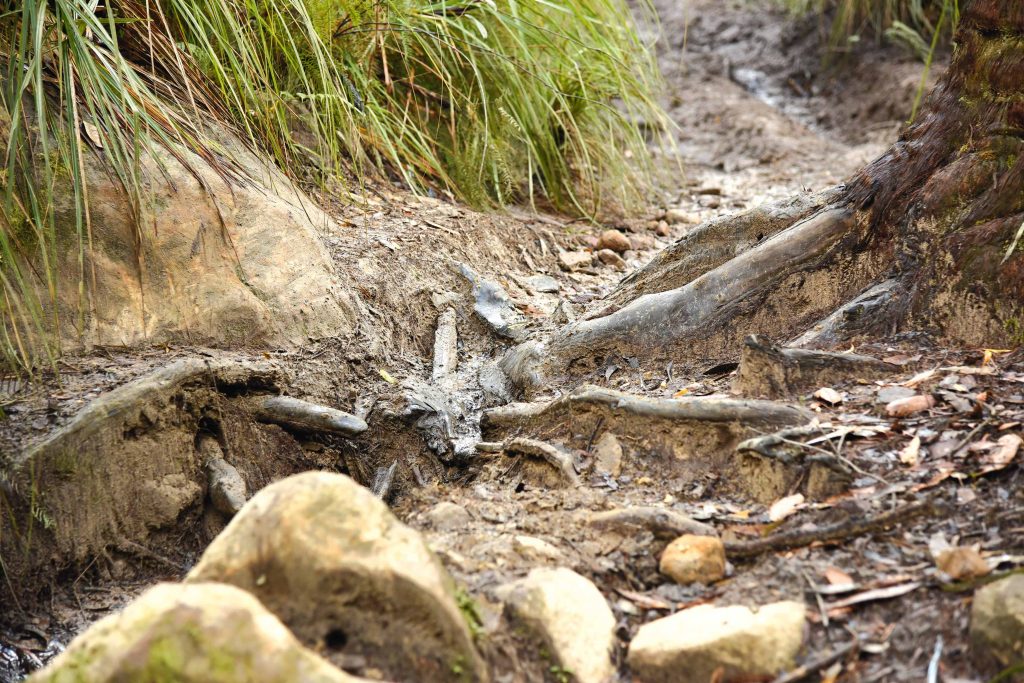
- Even though these roots look insignificant, a series of them can wear out an inexperienced rider, unless you use this technique.
- In general, roots are slippery – treat them the way you would treat a slippery character.
- If a section of roots surprises you and you are travelling too fast, try to get your front wheel up and over them, then pull in the clutch to let your back wheel roll over them. Pulling the lever, kills wheelspin which would make things worse for you!
DOs
Choose the right speed, position and gear BEFORE you arrive at the roots.
Keep it smooth – massive wheelspin or bad clutch technique can make it messy.
Use your legs as guides, let the bike take your weight.
Build up to riding roots standing up – it works even better.
DON’Ts
Hit the roots too fast.
Try and ride the high parts of the roots – it’s harder.
Forget to use momentum.
Unweight the rear suspension.
Look where you don’t want to go.