The Honda CR125 is probably the most well-known dirtbike. For some reason, whenever I meet someone who finds out I love dirtbikes, they often feign interest in my passion by saying something like “Oh cool, yeah, when I was a kid I used to ride my neighbour’s CR125”. I used to think people just say that to me because it’s the only bike they know but after a little investigating, it turns out the CR125 was one of the most popular bikes ever made. And this 1992 Honda CR125R is one of the best we’ve seen.
Honda launched the CR125M in 1973, with a two-stroke, 123cc, air-cooled motor in it. It proved to be a very popular motorcycle dominating the sales floor and the race track. Then, in 1978 Honda launched the CR125 Elsinore; a rare bike that was very well-built. It was equipped with a six-speed transmission and was distinguishable by the expansion chamber on the front of the cylinder where the exhaust attaches.
Despite the Godfather of Honda, Soichiro Honda, stating in the ‘60s that “Honda will never build a two-stroke motorcycle” Honda did in fact go and build a two-stroke motorcycle and a very good one at that. The 1974 CR125M was produced in greater numbers than any motocross bike ever built. That’s why everyone knows someone who’s ridden a CR125.
Rumour has it, that the Honda engineers built the CR125 in secret, keeping it away from management. When they eventually built up the courage to show the top dogs, those dogs, reluctantly agreed to let it slip into production. That production lasted 34 years before being discontinued in 2007.
When Honda first debuted the CR125 at the 1969 All-Japan Nationals it got hammered. Other manufacturers had been in the 125cc space for years and Honda was no match. Honda had another go in 1972 and that iteration was a ripper winning several races but, it was the name Elsinore, that Honda attributed to the CR125, after the film On Any Sunday, that really got it noticed.
This helped it sell like hot cakes. From 1974 onwards, Honda mass-produced the CR125 and almost instantly crushed brands like Penton, Bultaco and Hodaka who were famous for producing small-capacity two-strokes.
Sales and race domination of the 125cc class changed hands over the following four decades as the four Japanese manufacturers tried to outdo each other in the tech department. The CR125 was on the end of a plethora of changes during that period and received a major redesign in 1990. The ATAC power valve was abandoned, and the CR125 got an HPP power valve similar to the one on the 250.
The Showa upside-down fork also trickled down from the 250, which it got a year earlier. In 1994 Honda reverted back to the Kayaba and in 1995 Honda made another major overhaul with the frame and suspension.

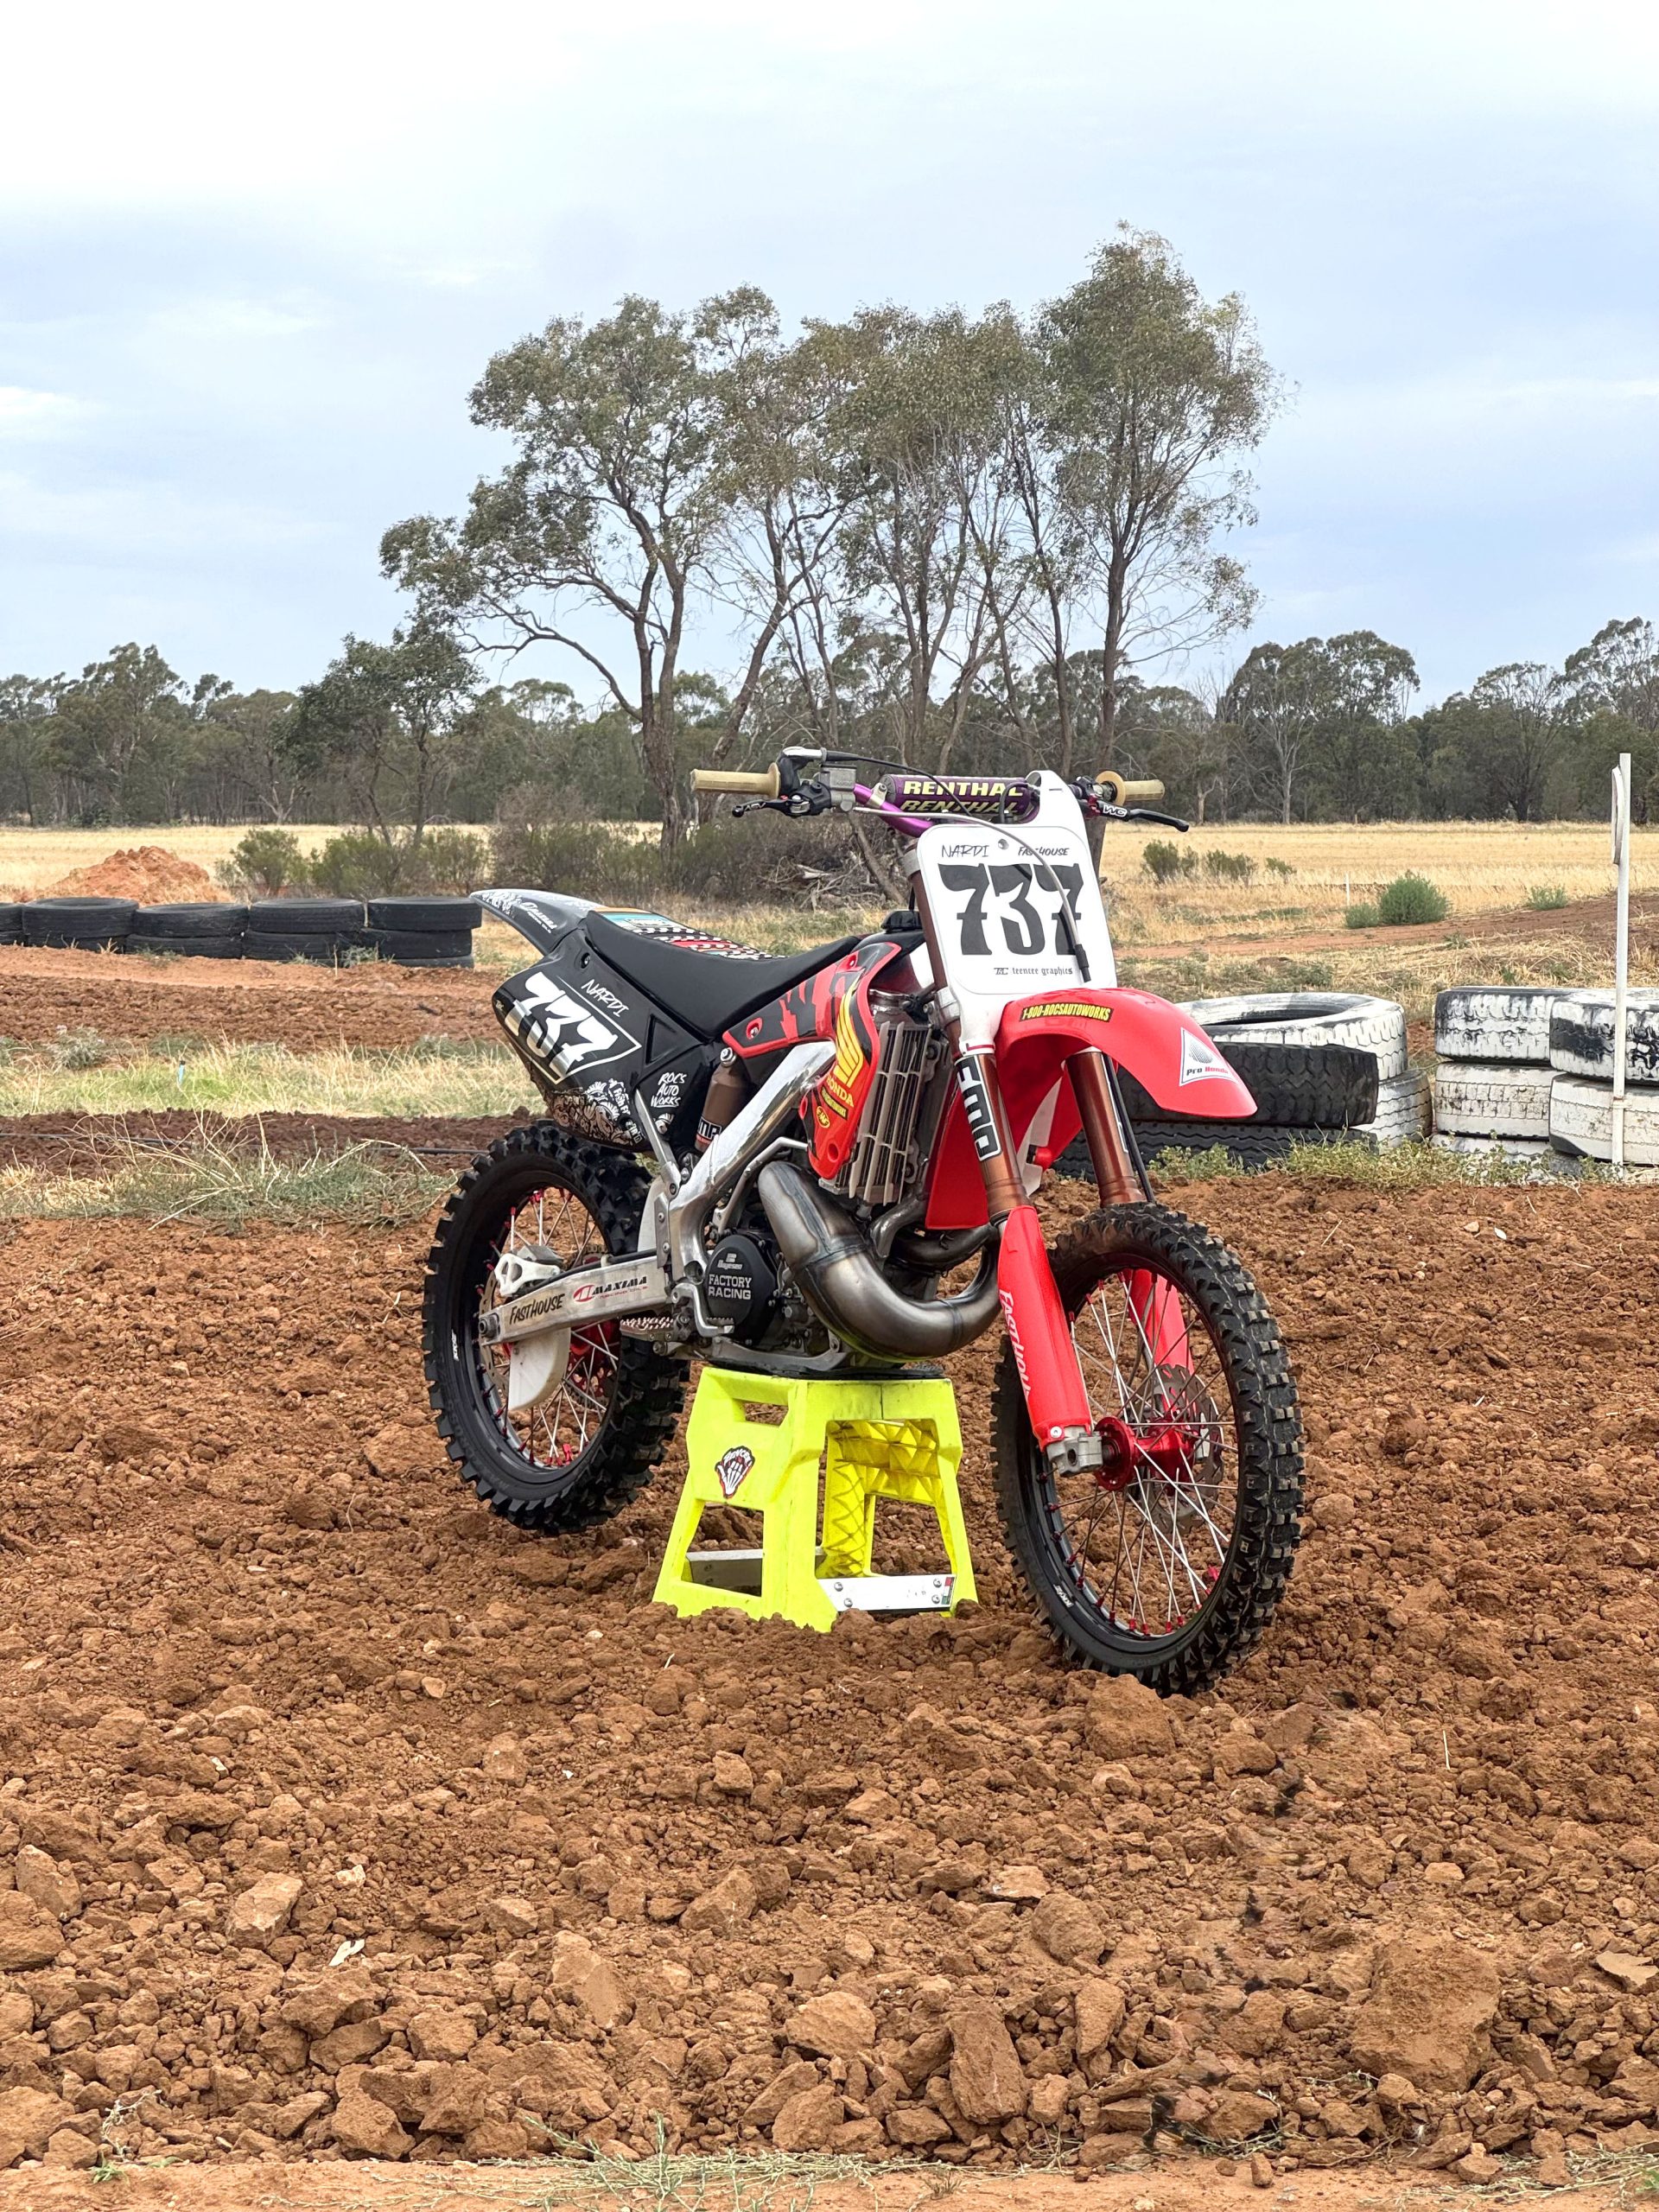
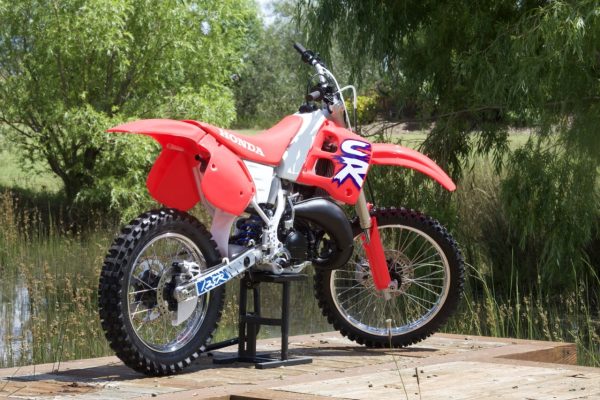
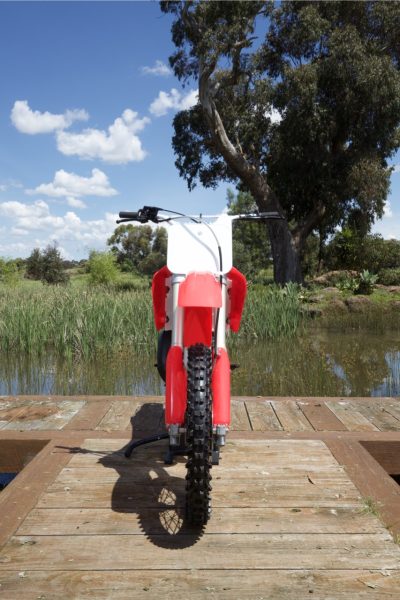
So, Pete Johnson’s 1992 Honda CR125R you see here is right in the sweet spot of that four-year development cycle. It wasn’t the first one off the production line with all the bugs and problems and it wasn’t the last one, making it outdated. We sat down with Pete and his son Kane to see if their enthusiasm for rebuilding the 1992 CR125R was as strong as the boffins that built the first CR125 in 1973.
ADB: Why rebuild a 1992 Honda CR125R?
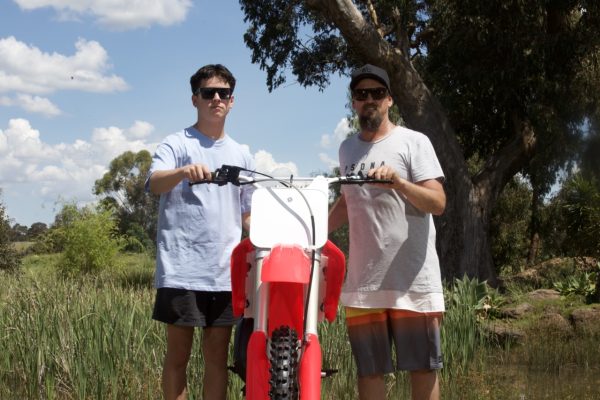
Pete Johnson: The reason we chose the Honda CR125 was because it completed the line- up of Japanese bikes. We actually got this bike after the Yamaha YZ125 but started the build before it and the purpose of this build is purely for show. Like our other builds, this one was about spending time in the shed together.
My son was 16 when we started this build and kids can go many different directions at that age. I think the amount of time you put in with your kids pays you back. So we spent hours and hours together. We created a bond that probably not many dads have with their kids.
ADB: Has Kane enjoyed building a bike with his dad?
PJ: Yeah he has. He’s loved it. I’ll come home from work and he’s already in the shed polishing the next part or he would be tinkering with something.
I’m excited to get home and work with him on the bikes. He’s excited to get home because whenever I get home he’s already in here.
ADB: So this bike is another COVID special?
PJ: I heard we were going to get locked down for another month again here in Melbourne, so I rushed out and bought this CR2125.
ADB: How hard was it to find a bike during COVID that you could rebuild?
PJ: This one I had to buy pretty quick. I had my eye on the bike for a while. The day the government announced the lockdown I bought the bike. We probably rushed into this one too quickly because there were some nasty things with it we didn’t realise when we bought it.
ADB: What condition was the bike in when you bought it?
PJ: It was rideable, and I paid $3800 for it. I found this bike on Facebook marketplace and it was just before things started getting crazy with price. It was about a three hour drive away. The photos of the bike were terrible, it was dirty and the bloke hadn’t even cleaned it.
It was just sitting in the shed. It was hard to find a ’92, there’s not a lot around. I was looking every day for nearly six months to find this bike. This one was on Facebook market place for two weeks.
ADB: When you got the bike back to your shed, what were some of the major problems you found?
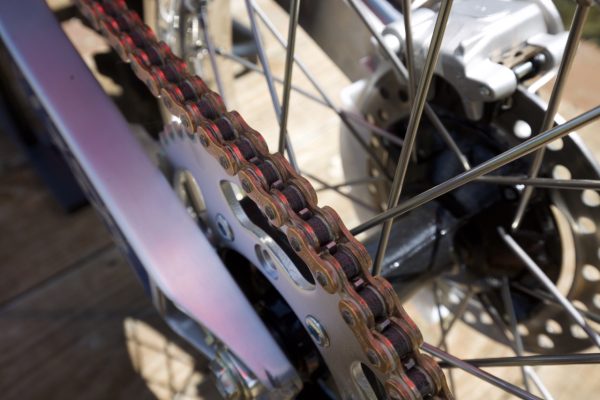
PJ: The case saver on this model was aluminium and that proved to be a challenge. When you snap a chain on this model, it would smash the casing and you just can’t find a left-hand case in good condition. You can find right hand cases but not left. One thing I didn’t realise when I picked up the bike was this left-hand case was smashed.
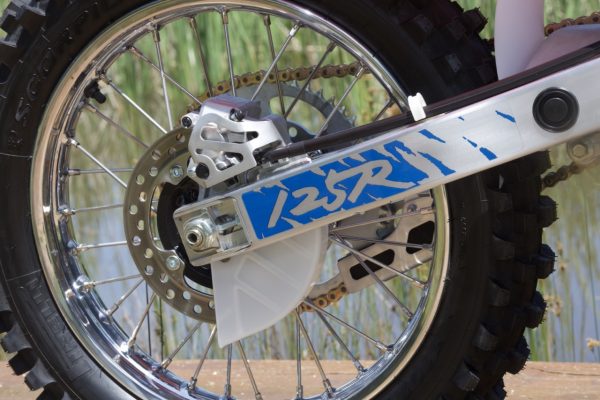
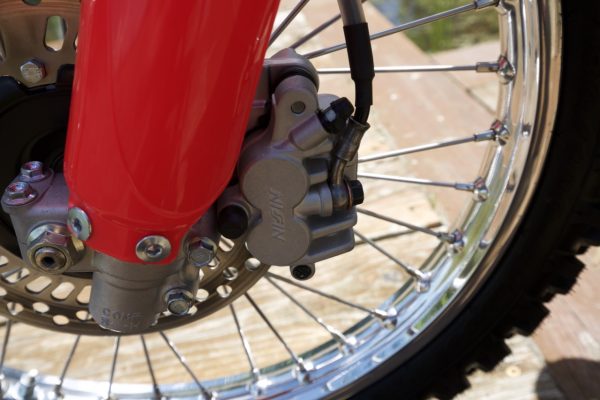
We had to re-anodise the forks as they were stuffed. The wheels were buckled, but they’ve been rolled out so they’re true again. They are the original rims.
The radiators were absolutely destroyed and had to throw them away. We could not restore them, and the suspension was pitting on the outside.
ADB: What was the hardest thing to fix?
PJ: The petrol tank. It was an awful repair job. I spent about 40 hours on the tank alone. That’s no word of a lie. I bleached it, I tried everything.
I bought a peroxide that’s industrial strength and sat it in the sun to make it go white again and that didn’t work. I put it under UV lights and that didn’t work. I sanded it back and started from scratch and still wasn’t happy with it so I started sanding again.
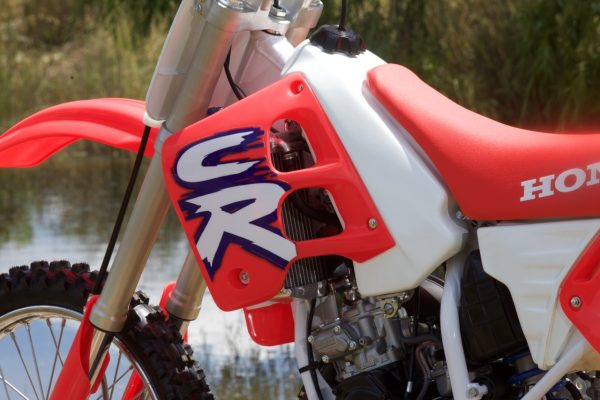
It was just too yellow but I didn’t want to take off too much material as that can weaken the tank. We think we can put fuel in the tank but we haven’t tried yet. So, and this may surprise some avid restorers, we decided to get the tank painted. We have a gun painter, Peter Maggs, who put together a mix that he assured us would mimic the plastic finish.
To our amazement it looks bloody perfect and we couldn’t be happier. You can buy a CR250 Clarkes tank, but you cannot buy a CR125 Clarkes tank.
ADB: So you really are meticulous about how your bikes finish?
PJ: To most people, they would’ve thought it looked pretty good but it just wasn’t spot on and I didn’t like how it didn’t match the frame. So we had to keep doing it until it did. I just couldn’t walk away from it.
ADB: Was this bike a complete strip down and rebuild like the others?
PJ: Yes, we pulled everything off it, and assessed every single part on the machine. We have different sections in the cupboards in our garage for things that can be restored, and for things that are totally stuffed. All the parts that we need to replace we write down. We write down what needs to be replaced and what needs to be restored as we go.
Trying to bring something back that’s almost dead is really tricky. If we can get a new one of that part that’s genuine then we would opt for that. A lot of parts go out for vapour blasting and we use Carlos at Square One to do that. For this game, vapour blasting is huge.
ADB: Who else did you use?
PJ: Ben at Western Metal Polishing who de-anodised the rims and then polished and fixed them. I do all the suspension myself. We pulled the whole suspension assembly apart and this one needed all new bushes and all new fork seals.
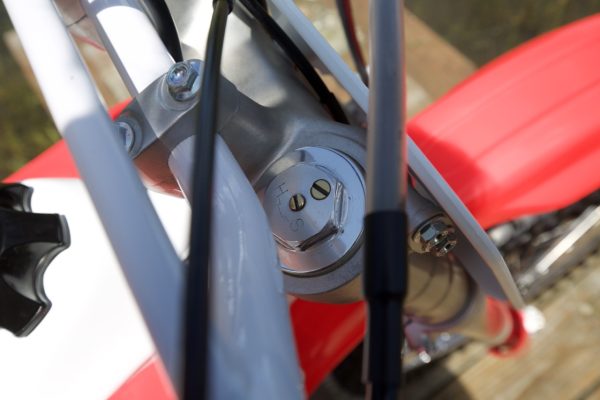
The outer fork tubes on this bike were horrible and we needed to get them machined and sent off for anodising. There’s not that many colours for anodising so find trying to find something that matches is hard. It has to be period correct.
This fork came back once and we weren’t happy with it because it wasn’t close enough, so it got stripped back down and re-anodised. We got the spring powder coated and I do all the sandblasting because I have a mate in Melbourne with a sandblaster where I can do it. For this particular rebuild we had the Honda frame painted. We weren’t totally happy with the painting of this frame, as we noticed when you try to tighten up nuts and bolts that the frame sometimes makes noises where the paint could be cracking or flexing.
ADB: The motor looks like a complete rebuild, is that true?
PJ: Yes it is. We get Dave from DM Pro bikes to do our motors. We used as many genuine parts as we could in the motor and the only non-genuine part that we couldn’t get was a piston.
If you take a close look at the bottom half of the engine you’ll notice every bolt in the bottom half of the engine on this motor is black. Every bolt on the top half of this motor is silver. Just another one of those annoying things that Honda did so these bolts had to be pulled apart, sandblasted and sent off to be black zinced.
You’ll see a lot of these bikes have just silver bolts everywhere, but that would not be period correct. When we see that it hurts because we know while it’s a bit of a hassle, it’s not hard to get it exact.
ADB: How do you guys know what’s original? And what’s not? That’s a pretty hard thing to pick up for the amateur rebuilder.
PJ: We look at a lot of pictures and the manuals. The manuals are the major thing, it should be one of the first things you buy after buying a bike. These manuals are as old as the bike, and they are incredibly detailed.
The manuals from back then are not like the manuals you get now. The manuals back then were designed for people to fully rebuild the bike. Nowadays manuals tell you not to put water in the fuel tank, back in those days manuals told you how to fully rebuild the bike.
ADB: Those plastics don’t look genuine, or are they?
PJ: The plastics are from UFO in the States but this bike is probably the most original of our entire line-up. The graphics on the tank and the radiators are not original. Believe it or not, the pipe is original. I had to blow it out and then re-polish it to look new again.
Obviously the tyres aren’t original. At least 80% of his bike has been rebuilt using original parts.
The Damage Report
Rear Mudguard Flap (white) $80
EXH Chamber $25
Seat Cover $65
Radiator and Fins $240
Brake and clutch lever $30
Kill switch $40
Air Filter $35
Gear shift lever $50
Rear brake reservoir $25
Rear disc guard $25
Exhaust springs and gaskets $50
Front sprocket 13T + 52T + chain $175
Clutch boot cover and bits and pieces $180
Decals $130
Grips $40
Accelerator cable $35
Chain and roller x2 $60
Brake hose clamp $40
Clutch cable $30
Brake shoes $30
Plastics $370
Handlebars $50
Total Build Cost
Bike Price: $3800
Build Price: $6430
Total Price: $10,230