Kawasaki was first cab off the rank with the KX450 last year, and KX250 for MY21, while Honda has joined the cause with its latest CRF450R. A hydraulic clutch adds cost, complexity and weight, but with most of the factory bikes dumping the cable, it’s now just a matter of time.
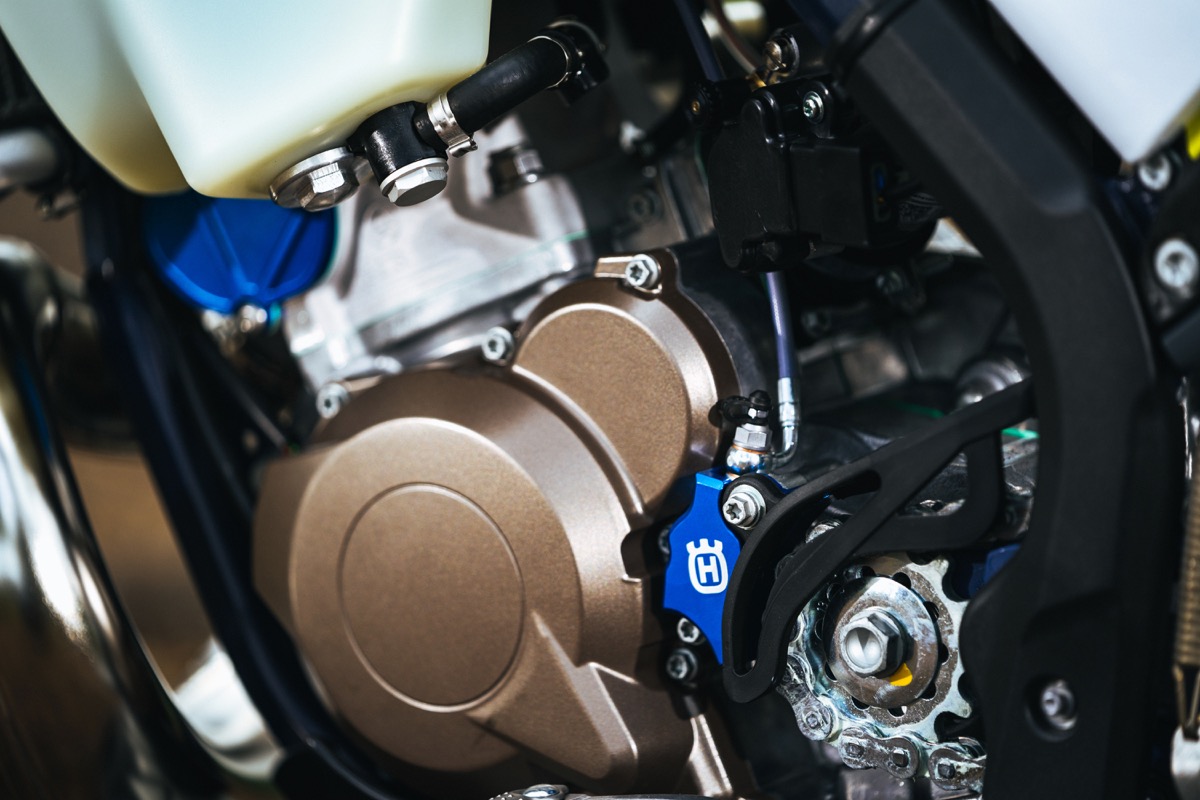
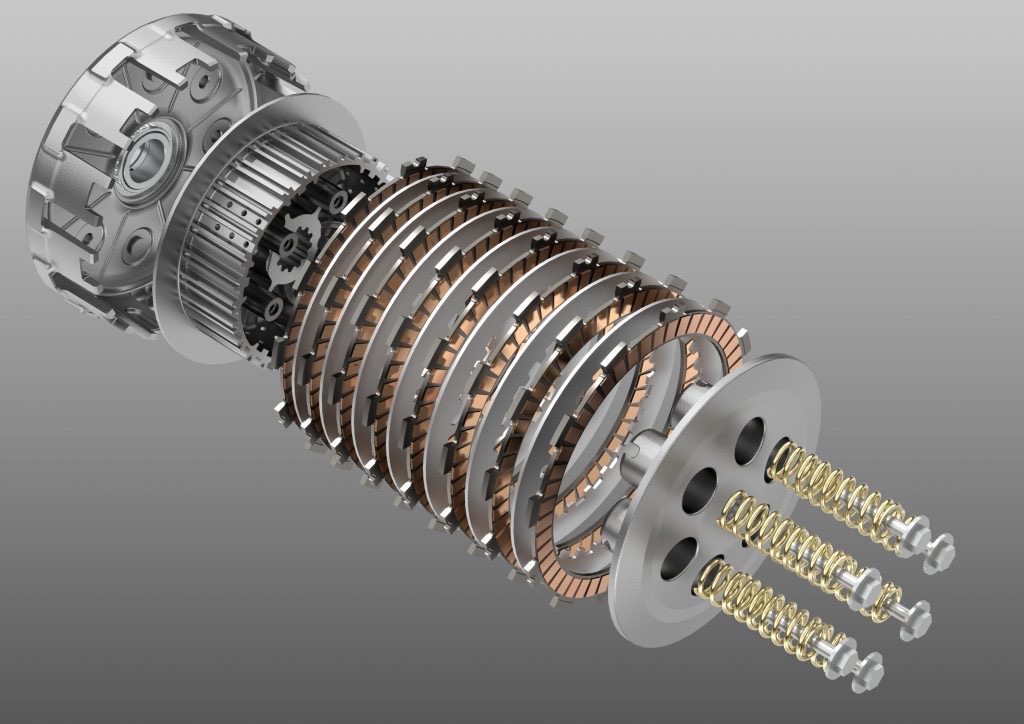
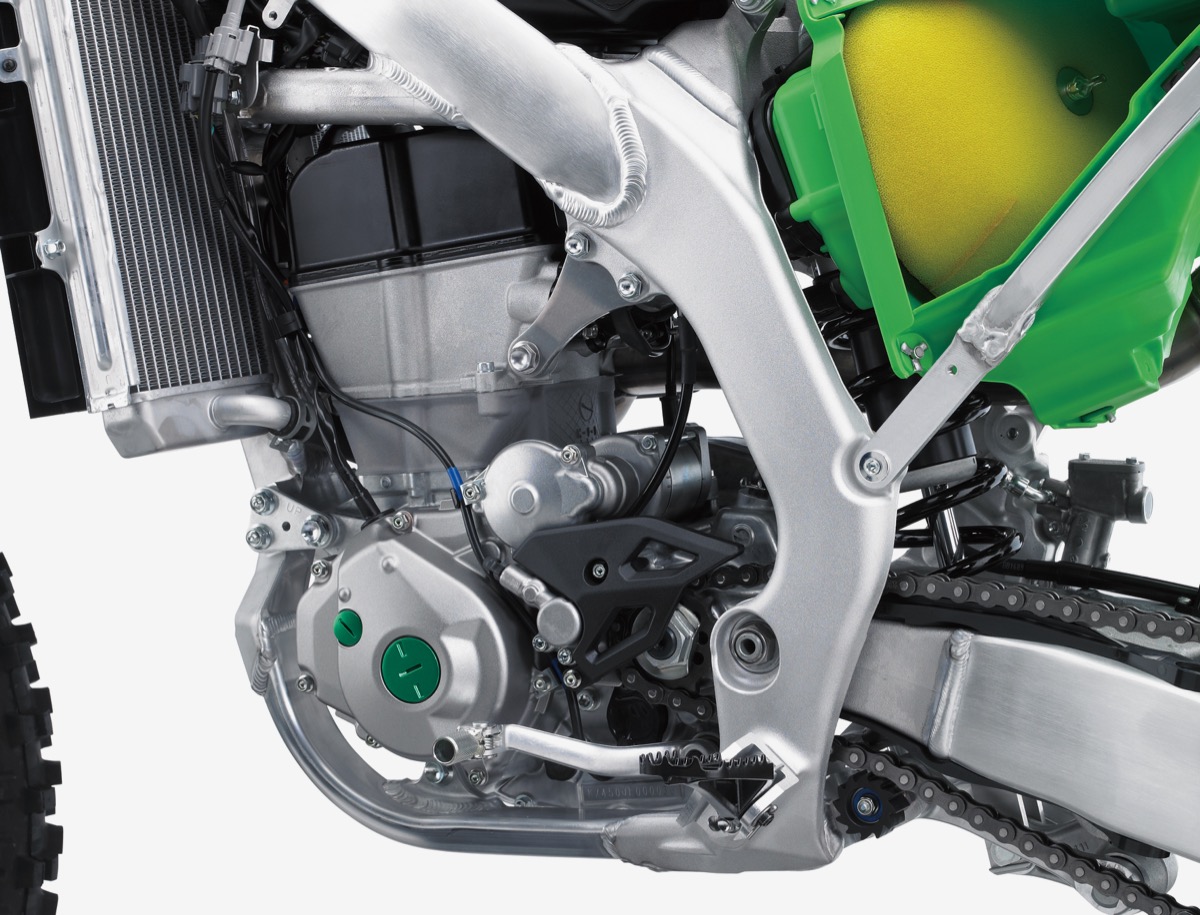
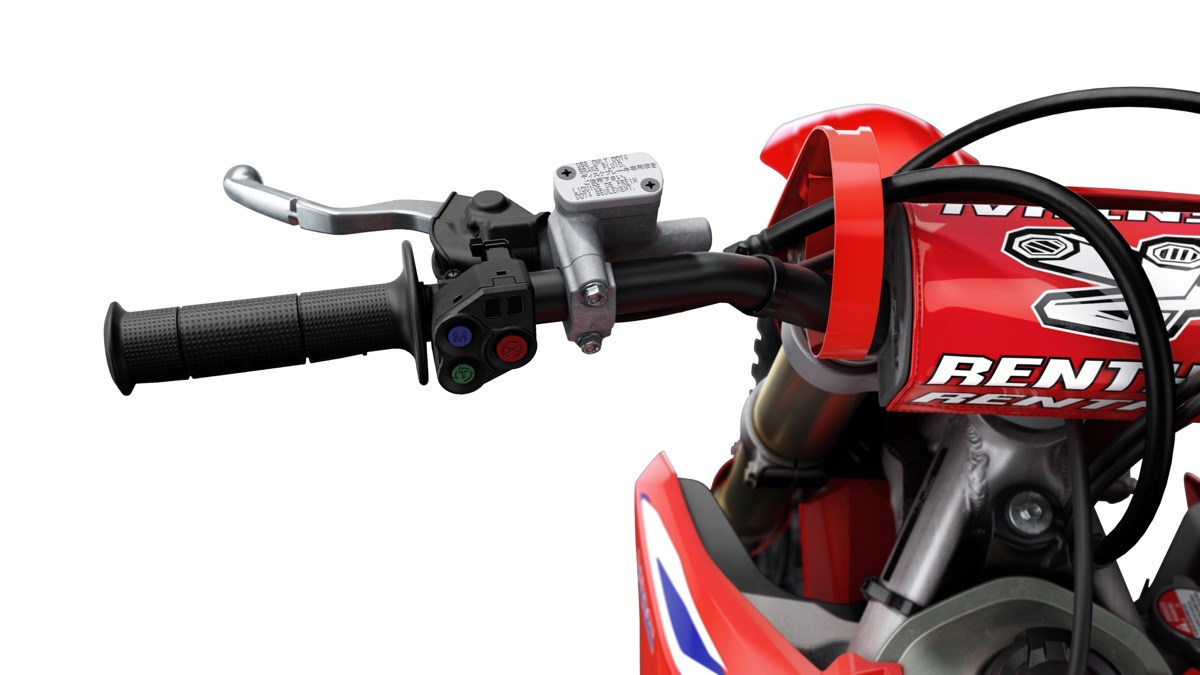
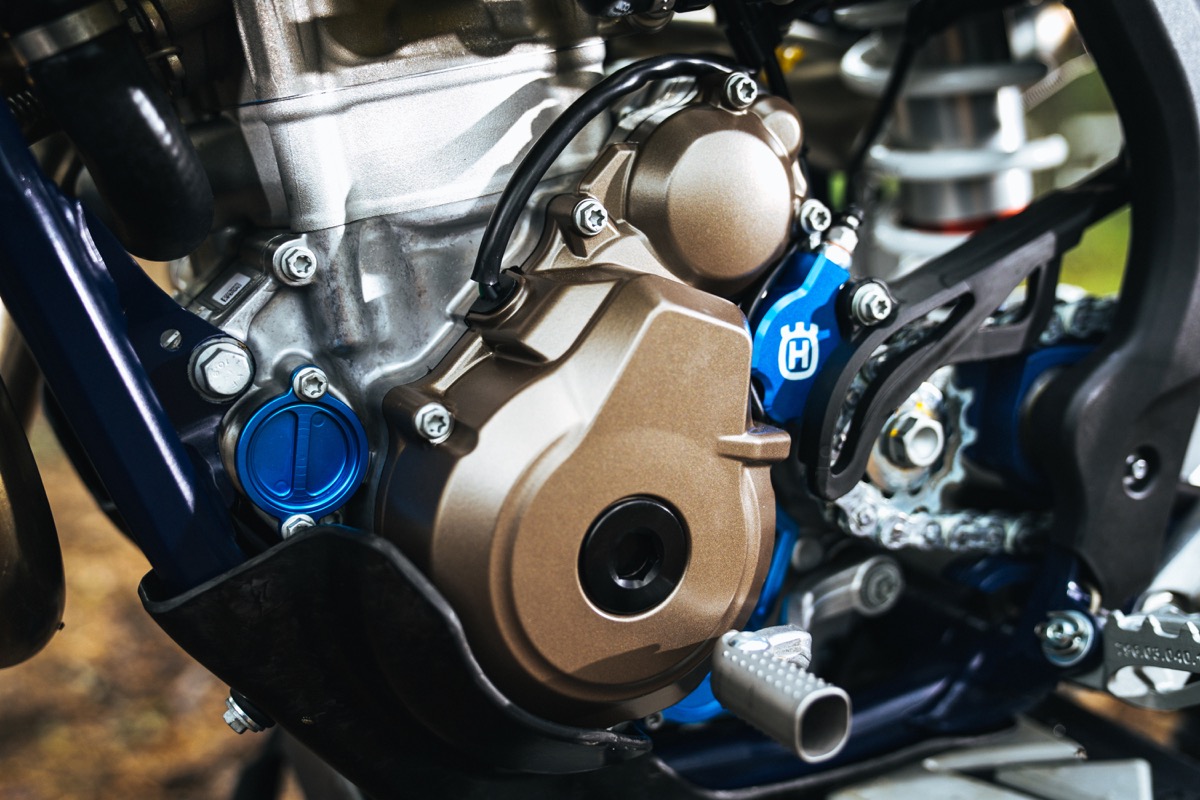
What we’re going to go through here is explain how they work, a few different designs and then give you guys the head- up on how to care for them and what things might go wrong. The way they work is pretty basic. There is a reservoir filled with fluid attached to the clutch lever. In this reservoir is a piston, not unlike the one for your front brake, that gets pressed when you pull the lever. The piston pushes fluid down a hydraulic line and into the “slave” cylinder bolted to the engine, often in front of the countershaft sprocket. This acts a bit like the caliper of a disc brake. The fluid filling the slave cylinder pushes against another piston that pushes against the clutch pack.
WHAT’S DIFFERENT?
The main difference from a cable clutch is pretty self-explanatory; one has a hydraulic line and the other a piece of braided wire. The hydraulic system uses a fluid which is almost completely incompressible whereas the mechanical clutch uses a cable and levers to transfer the energy and operate the clutch.
The big deciding factor is cost. A hydraulic system is expensive for a manufacturer to include as the crankcase, and sometimes the entire engine, needs to be altered and it has a lot more parts. The cable clutch might be cheaper to produce but it needs more regular maintenance and can fail with little warning.
The hydraulic clutch is self-adjusting and only requires fluid changes whereas the cable version requires regular lubing of the lever and cable to keep it running smoothly. You need to manually adjust the freeplay in the cable, sometimes “on the fly” in a race, and the cable stretches, wears and needs replacement.
MAINTAIN YOUR HYDRAULIC CLUTCH
Hydraulic clutch systems need regular oil changes as the fluid can absorb moisture. It’s recommended that you change it every 12 months, unless you notice it getting dirty sooner and then you should replace it immediately. You then have to bleed the air out of the system after you’ve installed the fresh fluid. The clutch lever pivot still needs regular lubrication to keep it smooth.
I recommend removing the bleed nipple on the slave cylinder and coating the thread with an anti-seize compound each time you change the fluid as these can be notorious for seizing and snapping off when you try to remove them. The screws in the master cylinder cap will also benefit from this.
BRANDS
Kawasaki and Honda (for MY21) both use Nissin hydraulic clutch systems while the European companies use either Brembo or Magura on their full-size bikes and Formula ones on their minibikes. They’re all pretty good products but mini-racer dads will know that the Formula systems can be tiresome to bleed and maintain.
WHAT GOES WRONG?
While there’s no steel cable that can fray or break, a pierced hydraulic line will render your clutch inoperable. Thankfully on most models, the hydraulic lines are covered in braided steel or double lined. While it is certainly possible to damage this line it is not common. I have broken way more clutch cables in my lifetime than I have broken hydraulic clutch lines.
There are rubber seals on the pistons of both the slave cylinder down on the engine and the master cylinder on the handlebar. These seals can be damaged by wear or from debris in the hydraulic fluid. If these seals get damaged then fluid may leak out of the system or air may get in and the clutch may go “soft” or stop working altogether.
All clutch systems have written on the cap of the master cylinder reservoir what fluid is recommended. Some take a DOT 4-rated brake fluid while others may take a DOT 5.1 or accept mineral oil only. If the wrong fluid is added it can cause seal and hydraulic line damage that eventually leads to the clutch crying enough.
Obviously there is also the chance of the master or slave cylinder getting damaged in a crash. It is much less likely for the slave cylinder to be damaged but as the master cylinder reservoir sits on top of the handlebar and houses the clutch lever it is susceptible to damage in a crash and can be expensive to replace.
More expensive is if the final-drive chain derails and hits the slave cylinder. In extreme examples, the chain can rip the slave cylinder right out of the crankcase, so it’s important to have a strong case saver fitted around the countershaft sprocket.
Bikes like KTM’s 65SX avoid this problem by running the slave cylinder directly on the clutch cover, but this can also get damaged in a fall.
BLEEDING A HYDRAULIC CLUTCH
There are two reasons you would want to bleed your hydraulic clutch. You have to do it when you change the fluid but you may also need to do it to get rid of air in the line.
Changing fluid
Just changing the fluid is a relatively easy and simple task.
STEP 1 Put a piece of clear tubing onto the slave cylinder bleed nipple and run it into a translucent bottle.
STEP 2 Pump the clutch lever several times and then loosen the bleed nipple. You will see dirty fluid come out into the clear hose and run into the bottle.
STEP 3 Continue to “pump” the clutch lever in and out while the bleed nipple is loose, pumping all the dirty fluid into the clear bottle.
STEP 4 Before the reservoir is empty, fill it with fresh fluid and continue to do so while pumping the fresh fluid through the system.
STEP 5 Once you see clean fluid coming through the clear tubing on the bleed nipple, tighten the nipple, top up the reservoir, refit the reservoir cap and wash off any fluid with soapy water. This stuff wrecks paint and the clear coatings on many master cylinders.
Getting rid of AIR
If you are trying to bleed air out of the system follow these steps instead:
STEP 1 Connect a clear bottle to the bleed nipple as above.
STEP 2 Pump the clutch lever several times and then loosen the bleed nipple. You will see dirty fluid run into the clear tubing and into the bottle. If there is any air in the fluid then you will be able to see this in the tubing. Before letting the clutch lever go, tighten the bleed nipple.
STEP 3 Continue this process of pumping the clutch lever and releasing the bleed nipple until you have removed all the air from the clutch system.
STEP 4 Remember to keep topping up the reservoir with fresh fluid. If you run the reservoir dry then more air will enter the system and you’ll have to start again.
STEP 5 Once you can’t see air bubbles, tighten the bleed nipple, top up the reservoir, refit the reservoir cap and wash off any fluid with soapy water.
There are syringes or vacuum bleeders available to make this job quicker but these are just a few quick techniques to get the job done at home in the garage or out on the trail or at the track.
Have your Clake too
Aussie company Clake manufactures a few different styles of clutch master cylinder. They make one that is an easy-pull lever which is claimed to reduce clutch pull effort by 75%. They also manufacture a dual system which can disengage the clutch and apply the rear brake at the same time or one after the other (below). This means that, by pulling one lever, you are operating the rear brake and the clutch, eliminating the need to use your right foot. They can reduce stalling, eliminate the need for a brake pedal and can help physically-impaired riders stay in the sport.
WORDS // MAT BOYD || PHOTOS // KTM MEDIA, KAWASAKI, HONDA