We gave you the list of stuff that was wrong with it last month but now it’s time to give you the inside scoop on what we did and how we made the 1998 Suzuki RMX250 go from trash to cash.
Trust me when I say nobody wanted this project to happen more than me. I took it knowing full well that there would be a few tears but the end goal was going to be all cheers.
There were moments when I was ready to throw in the towel but what kept me going was the thought of the finished product. That and the thought of whipping whoever did the previous bodgie repairs with a handful of cable ties soaked in carby cleaner.
This was not my first rebuild. I knew this one was going to have setbacks and I knew I would encounter problems that I would need to overcome which would set me back from the timeline. A timeline on a job like this has to be flexible. My advice for anyone about to take on a build is to give yourself twice as much time as you think you’ll need. That way when you encounter a broken part or any damage that you weren’t expecting your blood pressure can stay at a healthy level.
A bike of this age is going to have problems, the trick to buying one is to look for the bike with the least problems. It’s a used bike, it hasn’t been sitting in a crate for 30 years unassembled. With that said, I almost fell over when Mitch rolled the RMX into my workshop.
I almost fled out the back door of Boyd’s Motorcycle Surgery saying “tell them I’m not here”. The RMX had been the victim of the dreaded backyard mechanic for most of its life and it had repair job after repair job done by someone who had got their mechanical knowledge from Google.
With that being said, I have seen worse so I stripped the RMX and in last month’s mag gave you guys a list of the problems I encountered and the parts I needed to replace or fix.
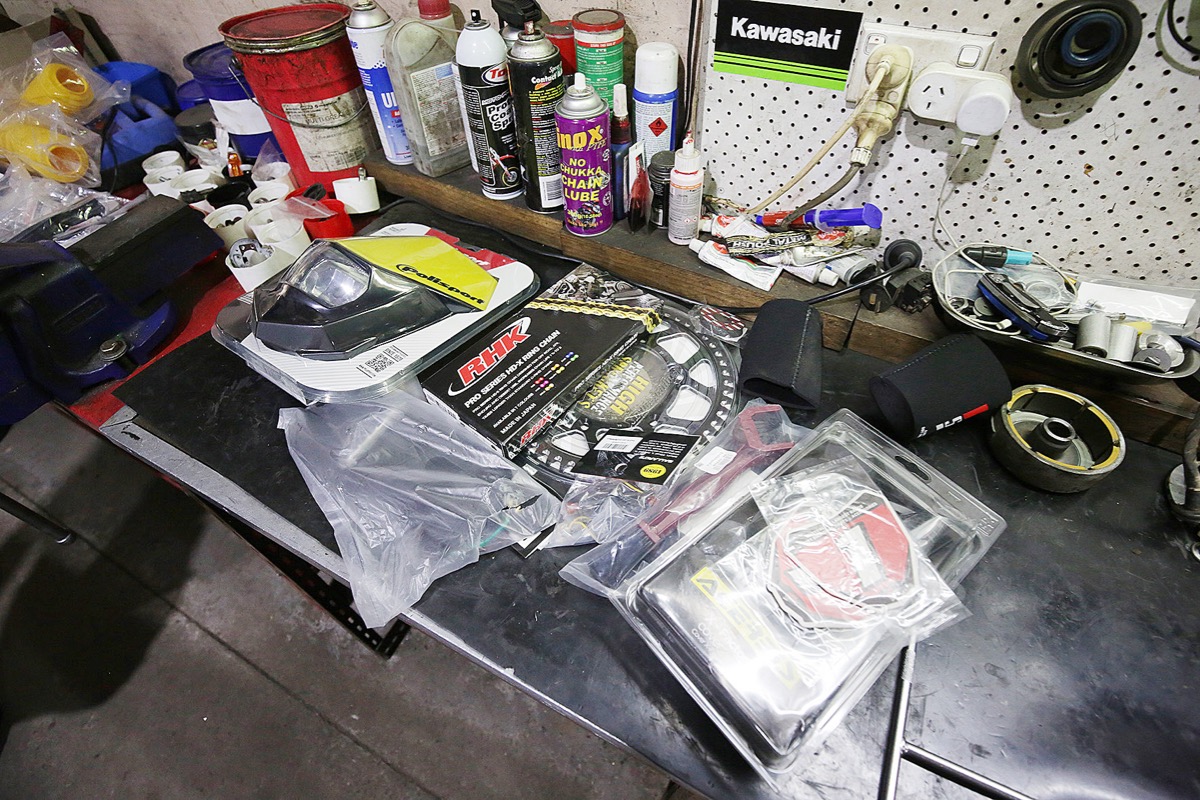
We put in the parts order and, while we waited, the RMX rebuild took off on social media and you guys started blowing up our emails and web pages with questions on when the RMX rebuild would be finished. You guys really put some fire up my backside and I got into it as fast as I could without compromising the build quality. Suzuki Australia, MXstore, Topline Upholstery, Kustom MX, Dunlop and Serco came to our rescue and supplied us with everything we needed to breath life back into this once might trail blazer.

HOW DID IT GO?
I won’t lie, I did have some moments where I looked at everything and thought, what next? But I tried my best to stick to a schedule and knock over a few parts of the job each week. The longest bit was actually sorting all the parts and opening the boxes when bulk loads of stuff turned up at once.
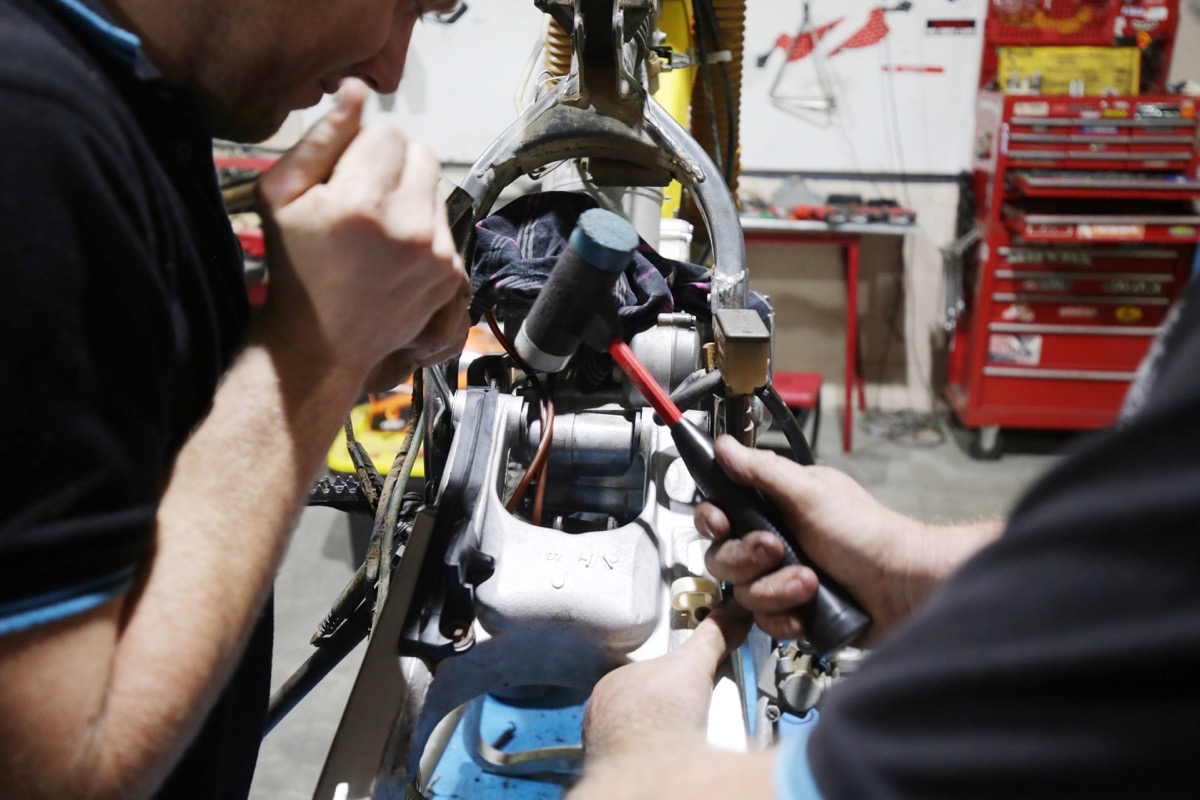
My plan was to knock the engine over first and then get onto the suspension but when certain engine parts were on back order that screwed that plan, meaning I had to improvise and just do what I could with the parts I had. Repairing the kickstarter and brake pedal plus straightening the frame were not part of the job when I put together my timeline.
All in all, though, I am impressed with the finished product. We have essentially ended up with a brand new old bike. Apart from the plastics and paint the bike is new and rides just like it is. My goal was to build a bike that would not have any teething problems as it is going to live several hours away from me and bringing it back multiple times was just not an option so I had to look at each part individually and decide whether there could be a future problem there or not.
I am very confident that I have achieved a very reliable bike. If you are doing a similar restore yourself then you could do it in stages. For example, build the engine first and a few months later do the suspension and bearings. This wasn’t an option for us, unfortunately, so we got the monumental task done all in one hit.
WOULD I DO IT AGAIN?
I have done rebuilds like this many times before on all sorts of bikes. I enjoy this kind of work very much. Having a bike that is filthy dirty and covered in 20 years of grease sucks but the finished product is more than worth it.
I get a real sense of achievement out of the finished product as well as the process. I love breathing life back into a relic. It’s just like reliving a bit of history for me but I have a real fondness for old bikes. I hope to do more and more of this kind of work but if you are not very mechanically minded then you might be best to farm the tech stuff out to a mechanic.
For instance, pull the engine out yourself but send it to a mechanic for rebuilding and likewise with the suspension. If you’re handy then tackle one part of the bike at a time. I have years of mechanical experience and a trade certificate behind me so I could assemble this bike blindfolded. I also have a large workshop so I could spread the bits out and still know where everything went. If you tackle one part at a time and take plenty of photos then you can get through a job like this without losing parts.
WHAT I’d DO DIFFERENT?
I really didn’t cut any corners with this bike or miss any steps but I was rushing to tear the bike down and did not pressure wash the bike before disassembly. This was a mistake I certainly won’t make again as the bike was a lot more difficult to degrease all the parts separately.
The idea was to achieve perfect mechanical condition but not be too worried about the look as it was going to be ridden. Once the bike was back together and being photographed for next month’s ADB it looked so good that I was disappointed that I didn’t blast the engine cases and paint the frame. I also would have liked to replace all the plastics. All this, along with a set of new rims, and the RMX would have looked like a new one.
TRACK TESTING
The RMX has gone off to be track tested and trail ridden to see how it performs and there are a few extra track tests to come. The plan is to test it against a few newer models as well as clock some time on the bike to see how it handles and performs. Stay tuned all you retro fans and keep an eye out for more RMX magic to happen soon.
Check the latest issue of ADB Magazine (#490) on sale now for Part 3 of the 1998 Suzuki RMX250 build project.
Here’s how it all went down in this 1998 Suzuki RMX250 rebuild:
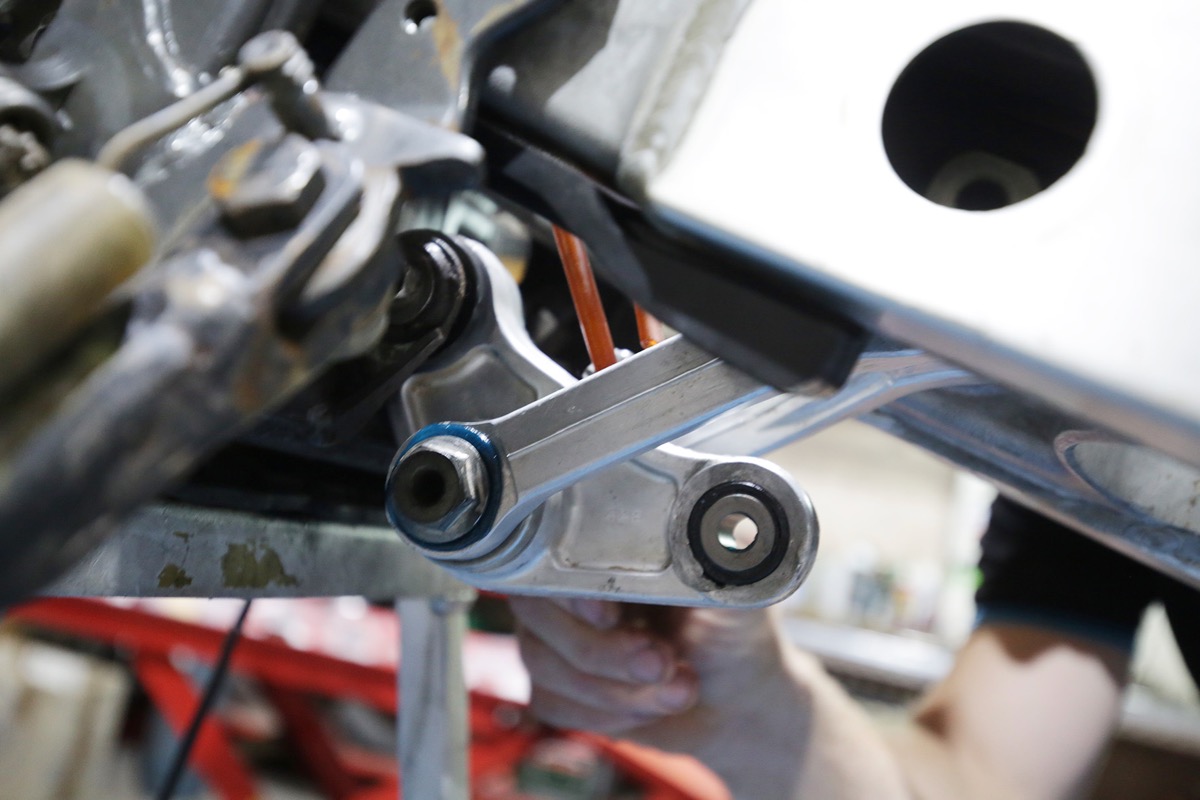
• Cut out old swingarm bearings and seals, press in new ones and pack with grease.
• Cut out old linkage bearings and seals, press in new ones and pack with grease.
• Press out old wheel bearings and seals and replace.
• Replace chain and sprockets and Loctite rear sprocket bolts.
• Replace upper and lower chainguides. Repair threads in swingarm and Loctite bolts.
• Replace tyres and tubes, re-tension spokes and replace rim locks.
• Replace front and rear brake pads.
• Replace front and rear brake pad-retaining clips.
• Replace rear brake fluid reservoir.
• Replace fork seals, fork bushes and fork boots. Clean out fork internals, linish fork tubes and fill with new oil.
• Machine worn left fork slider so it would clamp the front axle correctly.
• Replace shock seals, bush and bump-stop rubber. Fill with new oil and re-gas.
• Clean and degrease airbox and fit new filter.
• Remove dents from silencer, straighten and polish up so it looks clean. Repack and seal both end caps.
• Weld up holes in expansion chamber, remove dents, straighten and then polish so it looks clean.
• Replace brake pedal tip, straighten and realign holes so that the pedal fits correctly and replace pedal spring.
• Replace gearshift lever.
• Straighten bent footpegs.
• Weld up kickstarter and machine so that it doesn’t fold back too far. Then Loctite into place.
• Fit oversize handlebar clamps and fit tapered handlebar.
• Replace throttle tube and handgrips.
• Replace clutch lever perch and fit on-the-fly-adjustment lever.
• Replace all cables and grease cable ends.
• Replace broken brakeline clamps and Loctite bolts.
• Replace speedo with digital one, fit sender unit and mount magnet on front disc. Run wires to speedo and secure.
• Remove bulky headlight and replace with Polisport one.
• Remove old taillight, fit new one and rewire.
• Repair all damaged wiring and remove unnecessary sections. Remove all switchblocks, ignition key assembly and wire in a kill switch.
• Repair broken subframe and seal with silicone so it does not fill with water.
• Replace fuel tap seals and grease O-rings.
• Replace all fuel lines and clamps.
• Clean out carburettor, replace needle, seat and float bowl seal.
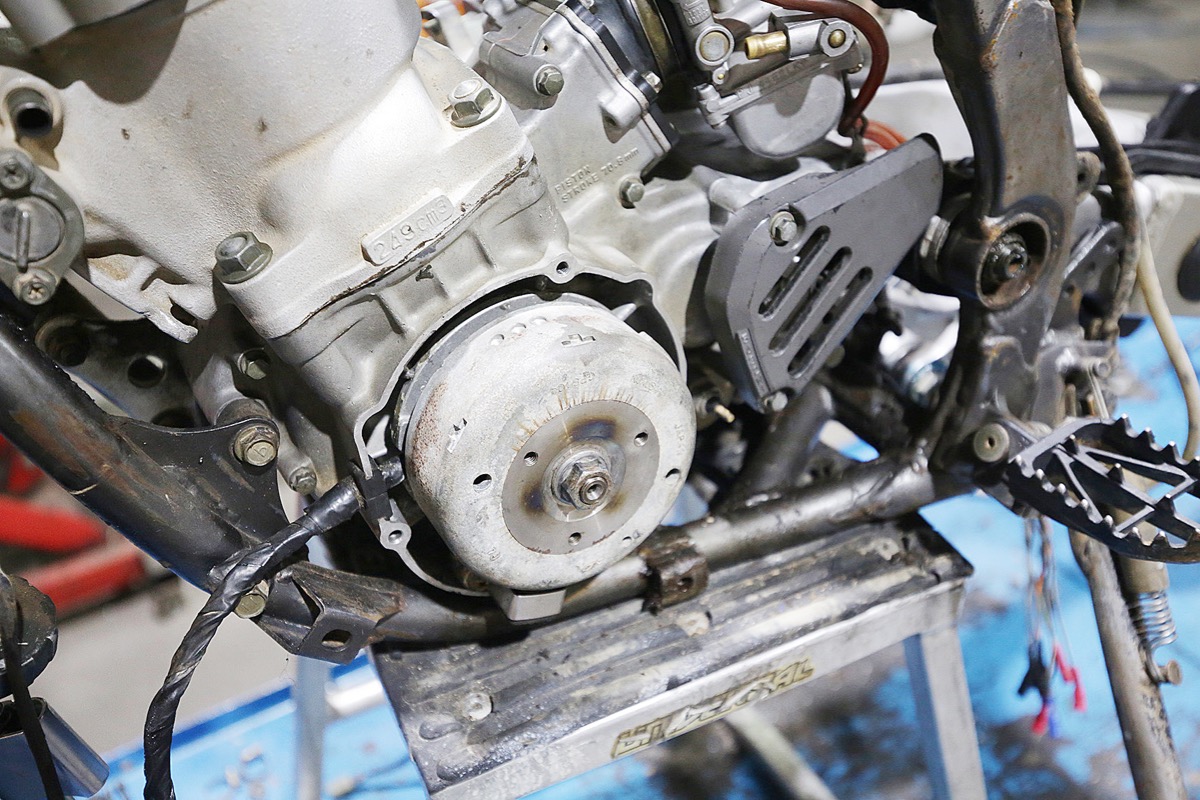
• Replace every single seal, O-ring, washer and gasket in the engine with new ones.
• Clean out cylinder and de-coke power valve. Hone cylinder and replace the piston, rings and little-end bearing.
• Press out old main bearings and replace.
• Press out old crankshaft and replace with new one.
• Replace plastic clips on power valve actuation rod.
• Remove old clutch plates and springs and replace.
• Press out all old gearbox bearings and replace.
• Replace coolant pump seal and pump impellor shaft. Grease, seal and reassemble.
• Replace reed pedals and Loctite retaining bolts.
• Straighten radiators and radiator filler spout so that the radiator cap would seal correctly.
• Send the seat to Topline Upholstery to have the foam repaired and a custom seatcover made and fitted.
• Clean all the plastics and refit.
• Fit rear disc guard.
• Degrease and clean entire engine and frame.
• Straighten bent section of frame where swingarm bolts in.
• Fit new custom graphics kit from our mates at Kustom MX.
• Adjust clickers and rear shock preload.
• Fill engine with fresh oil and fill radiators with new coolant.
• Mix up two-stroke fuel and fill tank.
Start engine and allow it to warm up. Check for leaks and then test run and tune.