Superminis are always a fun topic to talk about but are very foreign to us here in Australia. In the USA there is a Supermini class where riders can race anything above 105cc (up to 125cc). This class is common at local races as well as area qualifiers and Loretta Lynn’s Amateur Nationals. The Supermini class (a bike like the GASGAS MC112) is used not only as an extra class to race in but also as a great stepping stone to the 125 class.
In Australia a Supermini has to race in the 125 class against larger more powerful bikes so building a Supermini is much less common. The main reason you would build a Supermini to race in Australia is because the rider is old enough to race a 125 but to small to handle the weight and power of a 125.
There are two main ways to build a Supermini. One is to purchase the factory 105cc kit through KTM and fit that to the motorcycle. While this makes the bike faster than an 85cc the 105cc is still drastically slower than a 125. This is where the 112cc comes in. The 112cc uses the 105cc barrel but also uses a stroked crank that lengthens the stroke by 2mm to increase the capacity to 112cc, making the bike much more competitive in the 125cc class.
The Start
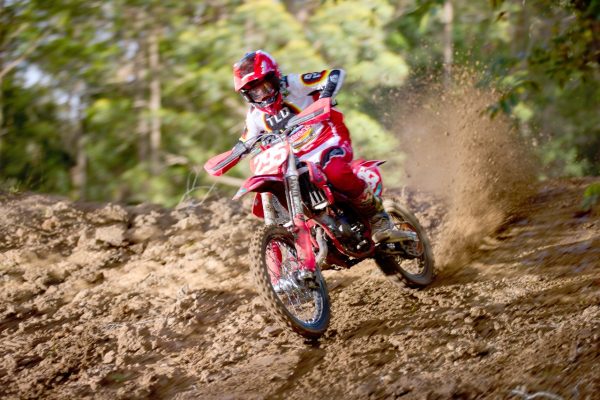
Seth Thomas had already won state and national championships in the 85cc division but once he turned of age to ride a 125cc he was still quite small in stature. We needed Seth to keep developing as a rider and the best way to do so was to join the 125 class with quicker more skilful riders.
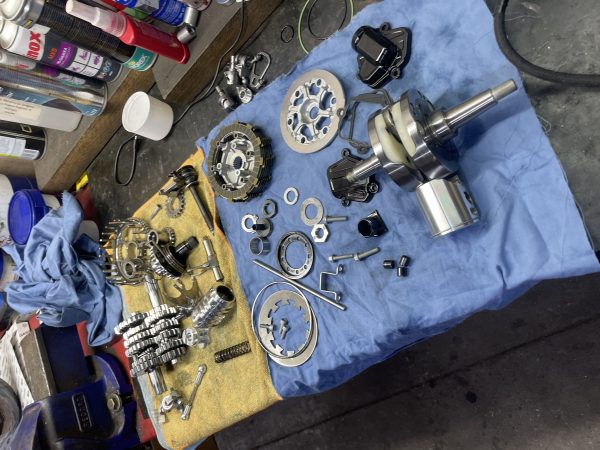
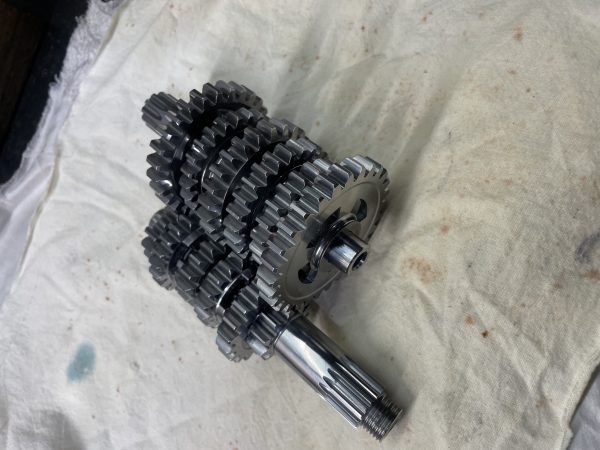
We started out Seth’s build with a brand new GASGAS MC 85 supplied to us from GASGAS Australia. Every nut and bolt was stripped down to start the build and the parts were sourced. The first thing we had to do was send the gearbox, crank webs, primary drive gears and kickstart gears off to be polished. This process is done in Melbourne and there’s around a two-week turn around, so we had to get this underway as soon as possible. Once we had the gearbox sent off we stockpiled our parts and got things underway.
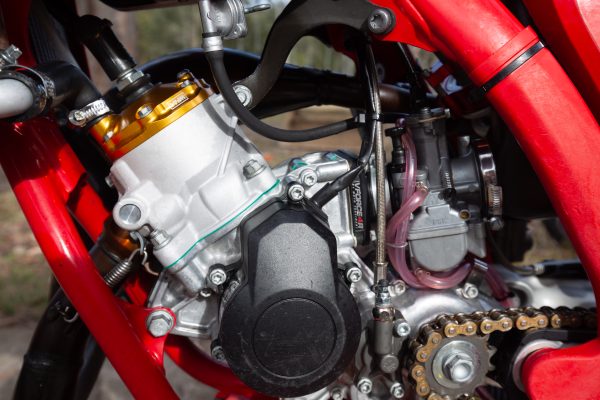
The Engine
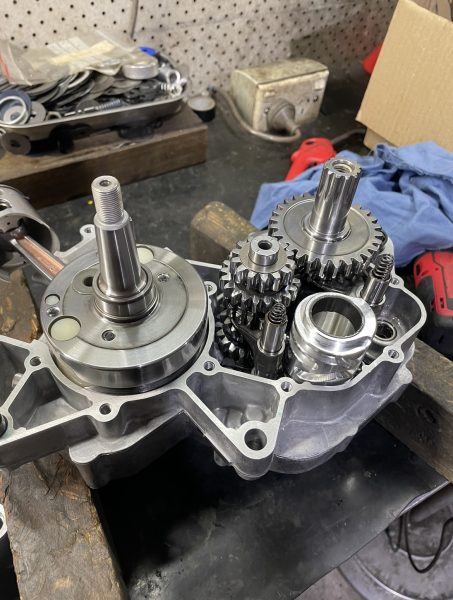
The engine starts with a fully polished gearbox, clutch basket, crank and all kickstart and water pump gears. The idea of this is to reduce friction in the gearbox. This in turn helps the gearbox run cooler and cleaner while also adding strength and durability to the gearbox, as it removes any burs or impurities that the gears may fracture or break from.
Next is to build the crank. The crank webs come from VHM and the pinhole in the crank webs is moved 2mm higher to lengthen the stroke by 2mm. The crank also contains a VHM lightweight conrod, and this is also polished after being pressed together and balanced to perfection. These 112cc cranks need to be balanced perfectly or there will be a load of vibration coming from the engine, so it was important for us to get the crank balanced with a runout of zero.
The cases are ported and reshaped by myself and are matched and matted to the ports in the 105cc cylinder that we received from GASGAS. The transfer ports in the cylinder are cleaned up and all burs and lumps are smoothed out but the rear boost port and exhaust port are changed quite significantly so the 112 will produce as much peak horsepower as possible without sacrificing any bottom end.
The intake of the cases is reshaped and I use a two-part epoxy to change the shape of the intake for better flow and air speed into the engine. I have experimented with ceramic bearings but for this build we find we can produce the same sort of power without them, so they weren’t warranted in this build.
Once the gearbox and crankshaft is assembled in the cases the bottom end is pressed together and all bolted up. Then the gearbox and clutch side of the engine is assembled, as is the stator.
Once the bottom end is complete I modify a Vertex 105cc piston. What I found is the standard 105cc pistons have a habit of cracking through the exhaust skirt but I chamfer the corners of the exhaust skirt to take the ring out of the skirt… and the skirt no longer cracks. Then I reshape the crown of the piston in the lathe and polish the piston crown. This is then fitted into the cylinder with a 1.0mm base gasket. In the past I have seen many other engine builders just stack tons of gaskets together so the piston clears the stock head but this is incorrect and while it still runs, and runs better than an 85cc, it is still leaving a lot of potential power on the table. I sourced a 105cc cylinder head and insert from VHM for this engine. The VHM cylinder head disperses heat better than the standard 105cc head and looks pretty fancy too.
The 105cc insert will not work without machining. If you try to fit it without machining the piston will hit the head and the engine will not turn. I machine the squish and head volume to suit the power Seth is looking for. I have tried heads from the US but unfortunately as they have different fuel over there they don’t work as well as a head I have machined here in Australia will. The head still takes the same NGK BR9ECM spark plug but I remove the internal power valve spring and just leave the outer spring ready to be tuned on the dyno later on.
The Electronics
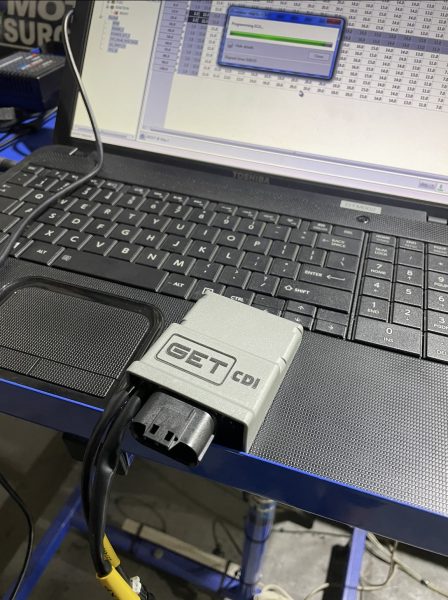
While the stator and coil are the same as the 85cc engine there is a GET CDI that I have personally mapped to suit our fuel and conditions here in Australia. Again I have tried to use CDIs from the US but struggled with them as they are not well set up for our conditions. The GET CDI we use is intended for an 85cc but I stuck the bike on the dyno and developed our own map that suits our fuel and conditions here in Australia.
Developing a map is quite time consuming; this particular map got changed several times over a period of about three months. As we developed the bike further and Seth became more used to the power, we were able to keep altering the mapping to a point where both myself and Seth were happy with it.
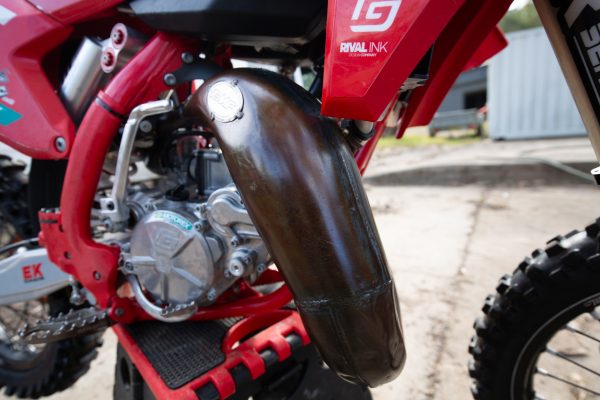
The Exhaust
The exhaust is an FMF big boy exhaust system. It is intended to be used with the 105cc kit but we have fitted it to the 112cc… but not before some slight modifications. I have taken to the expansion chamber with a welder and a grinder to change the shape, and to make the area right where the exhaust connects fit and match the exhaust port better. This gave the engine much better throttle response and low-down torque.
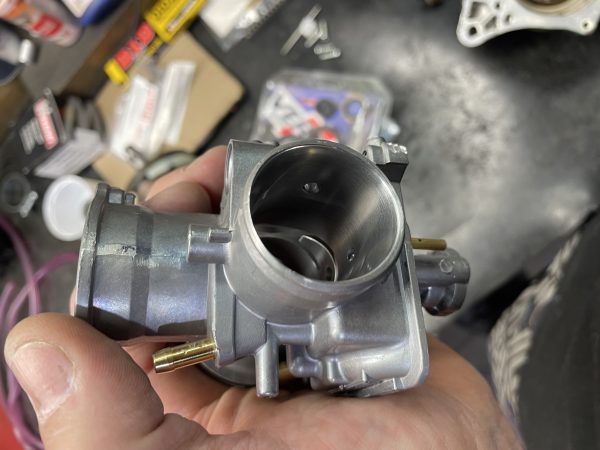
Carb and Intake
The carburettor is bored to 29mm and the shape of the carb is altered. The jetting is also changed to suit the 112cc capacity. A common misconception is that a bigger capacity engine needs bigger jets but this is not always the case. The 112cc has a smaller main jet and pilot jet compared to the 85cc but the engine has more vacuum and is able to draw more fuel from smaller jet sizes.
Weirdly enough though the needle is drastically richer. I have to admit, getting the needle right was quite a challenge. The US needles as well as the 105cc needle cause bad pinging with the 112cc engine under light to moderate throttle, so I had to go through several needles until I found one that was a few sizes richer than the stock 85cc needle that did the job perfectly.
This carb is paired with a modified intake manifold and a set of VForce 4R reeds that have also been modified. The air filter we chose was a Funnel Web as it has a good sealing base and we knew it would keep the engine safe from any dust and dirt.
Gearing
The stock 85 gearing just won’t do on this engine or you will be shifting every three seconds. We toyed around with going down teeth on the rear sprocket but actually settled on using a 14 tooth front sprocket and a 50 tooth rear sprocket. This means Seth’s 85 and 112 both use 50-tooth rear sprockets and the wheels areinterchangeable, while also lengthening the gear ratios on the 112 so Seth isn’t constantly shifting gears.
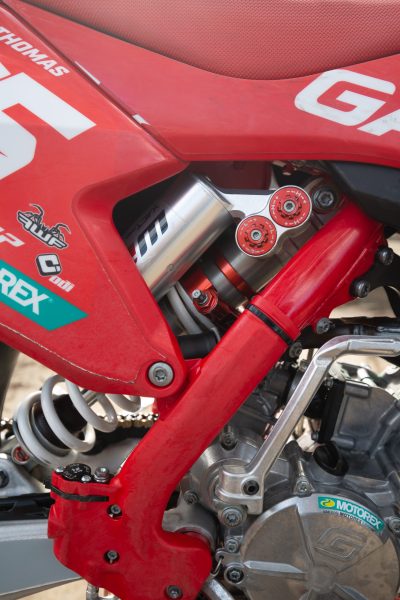
Suspension
The suspension on the 112 is a WP cone valve fork in the front and a WP Exact Pro shock in the rear. Both of these are valved and setup by JR Factory Services in Maroochydore, Queesland. Seth has a set of suspension that is set up for hardpack and another set for sand that can be interchanged depending on the track. There is also a holeshot button fitted to the right-hand front fork leg to lock the front wheel down to prevent wheel standing off the start line.
Dyno Time
The number of hours this bike has spent on the dyno in development could not possibly be counted. As this was a new venture for me, and I didn’t just want to settle and copy anyone else’s work, I needed to put in the R&D to push every part of this engine to its full potential.
There were plenty of moments where we went back and forth from the track to the dyno, constantly changing settings to make the bike better each time. Part of what makes this bike so strong but linear is the way we have set up the power valve. I spent the time on the dyno to adjust what revs the power valve opens ate, and coordinate it with the jetting and mapping so the engine is very strong but linear, with no dead or low points in the power curve. This allows Seth to ride the bike to his full potential.
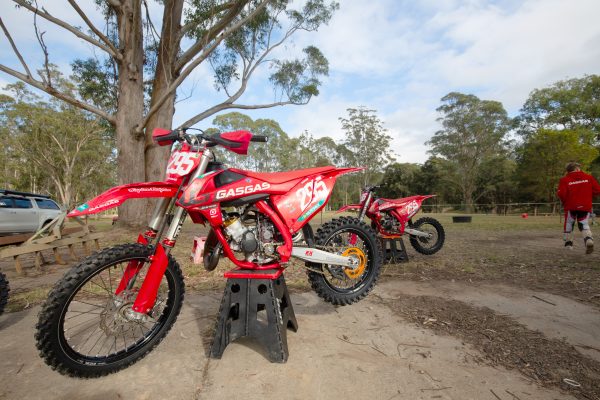
Cosmetics
Seth is a GASGAS Australia rider so gets his team graphics from the team, which his Mum Jess does a great job of fitting.
The seat cover is supplied from Strike Seats and I fit those up to his seats. We have a flat seat and a seat with a hump that helps Seth stay forward on the bike in corners and off the start. We are able to change these seats quickly and alter between the two depending on track conditions and Seth’s request.
To finish the bike off we have a set of ODI grips and handlebar.