Even from new they can leak, but once they’ve had a few rebuilds they become worse. If you were to take a look at any two-stroke KTM you are likely to find a build-up of grime around the base of the power valve cover on the right-hand side of the engine. Unfortunately, I don’t have a cure for you that does not involve Silastic, but if you’re prepared to use silicone I have a technique that works perfectly if done correctly. So here is how to seal a KTM power valve step-by-step.
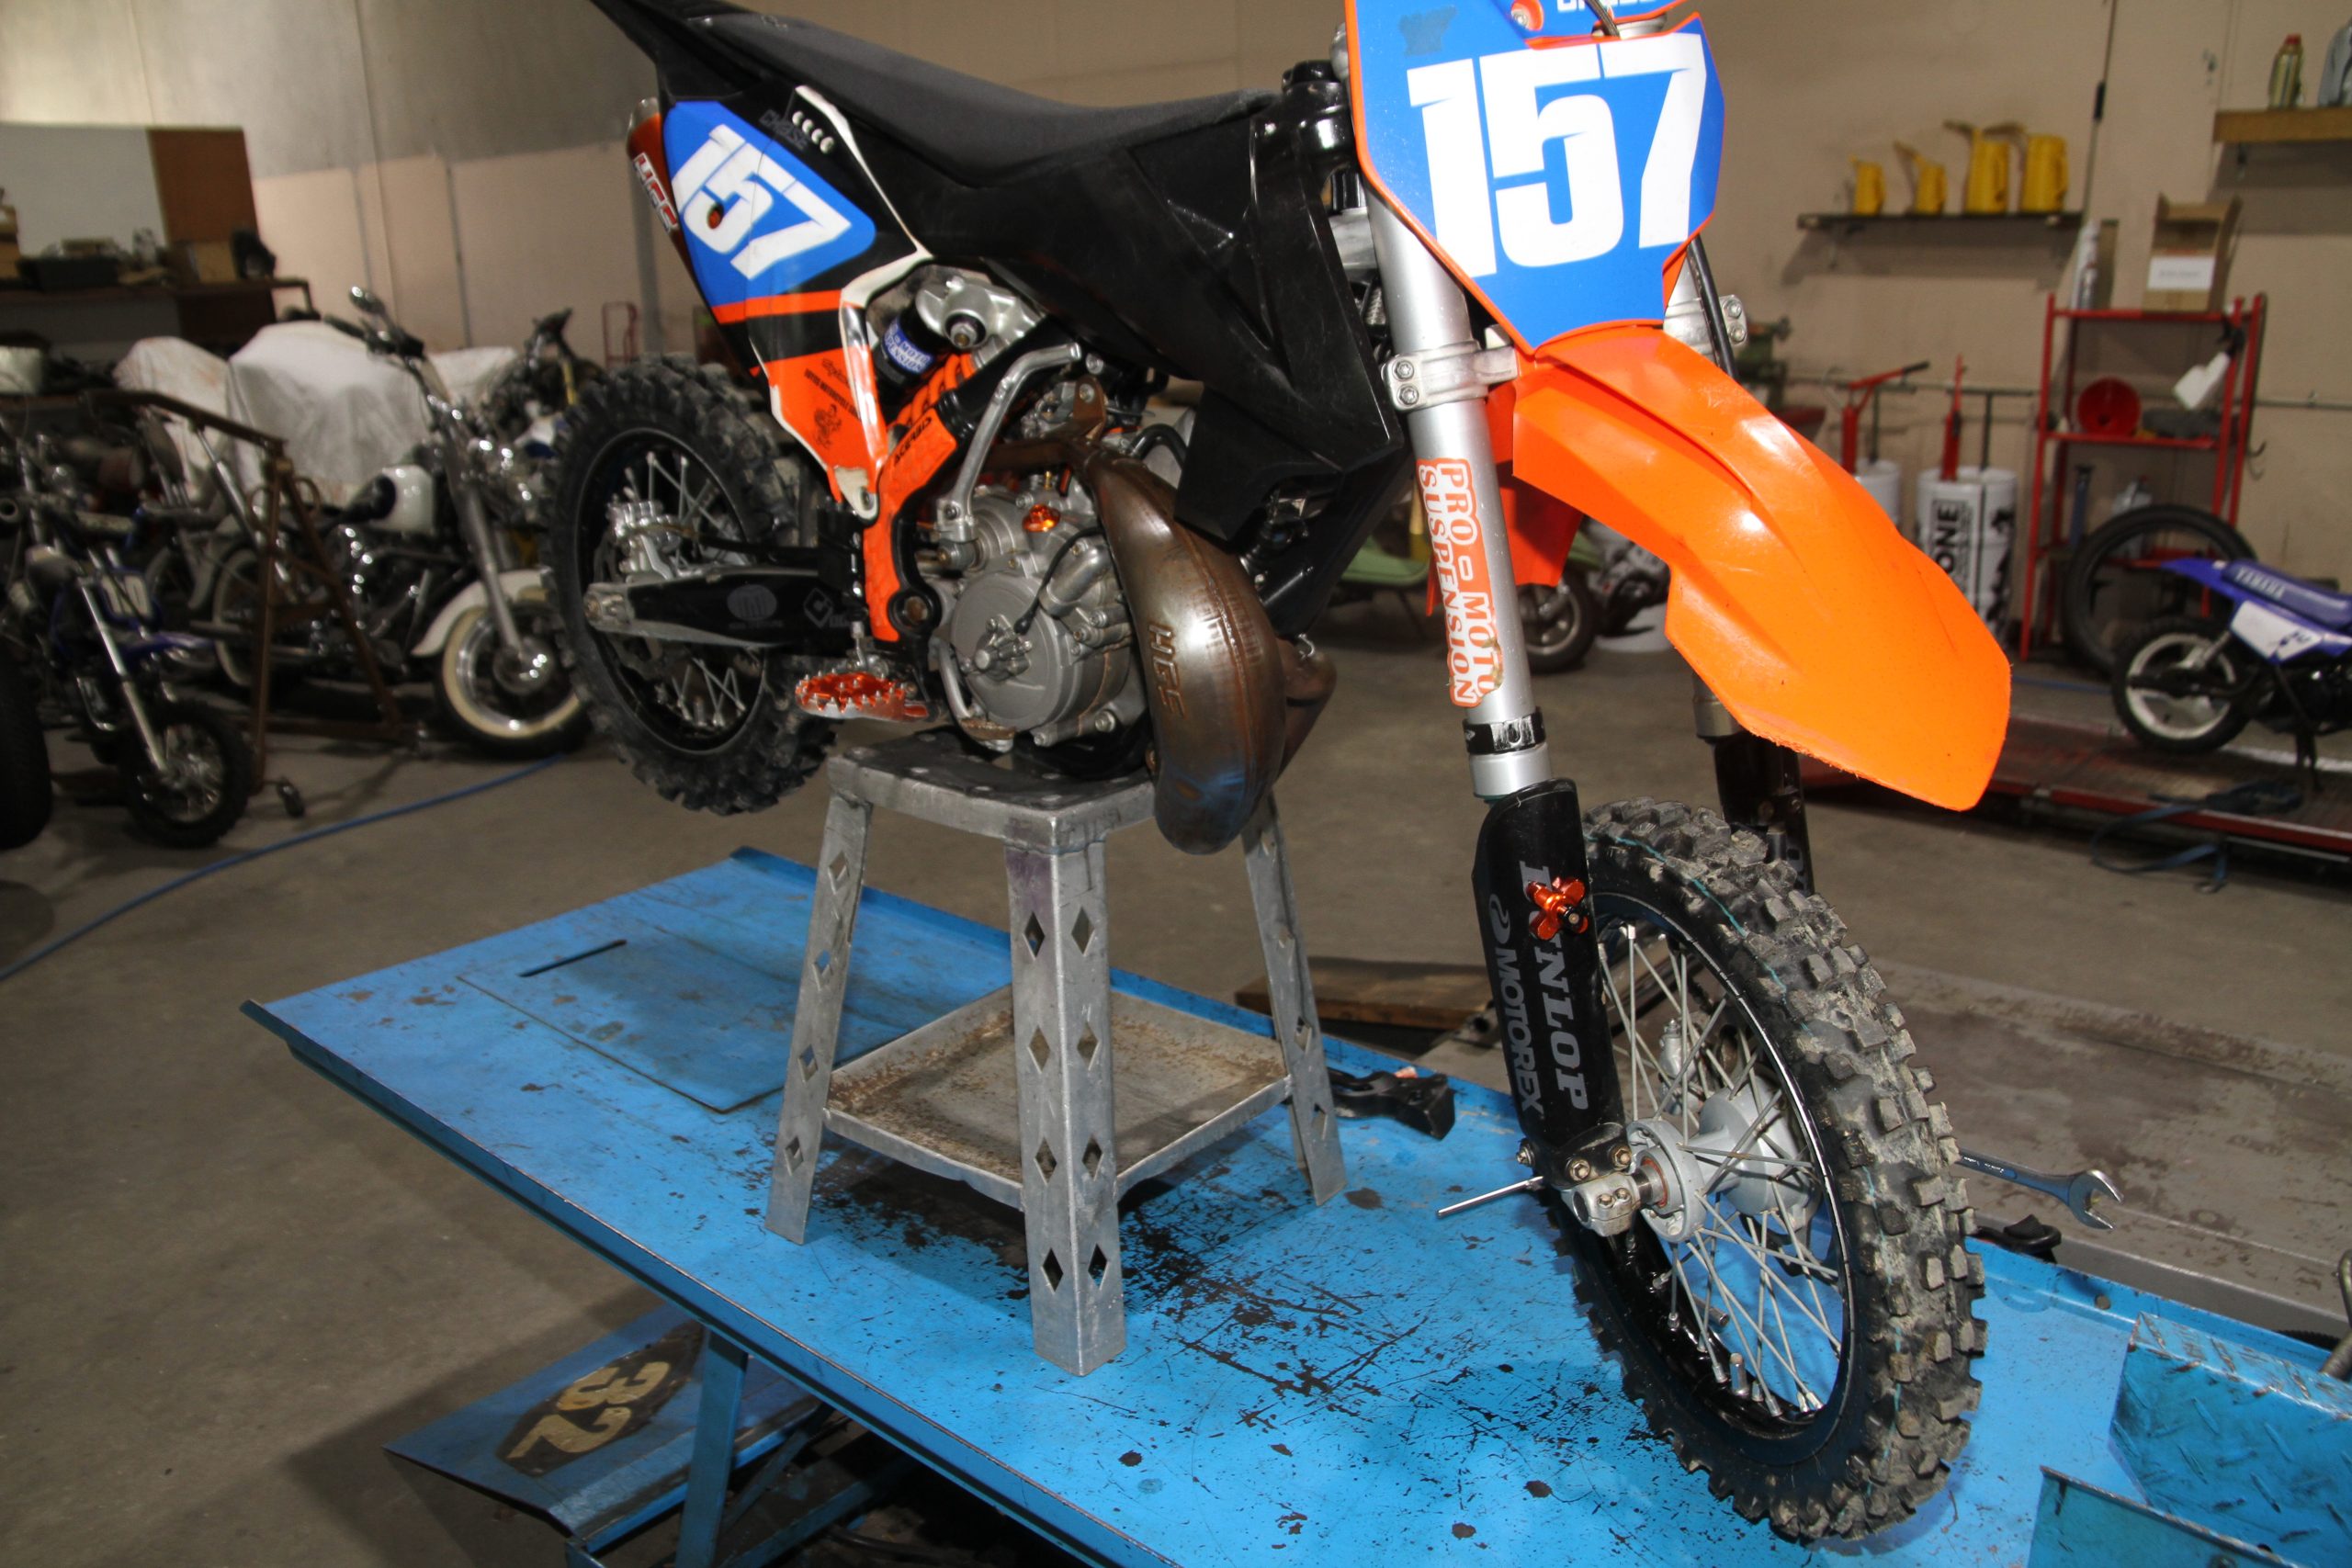
Step 1 SECURE THE BIKE
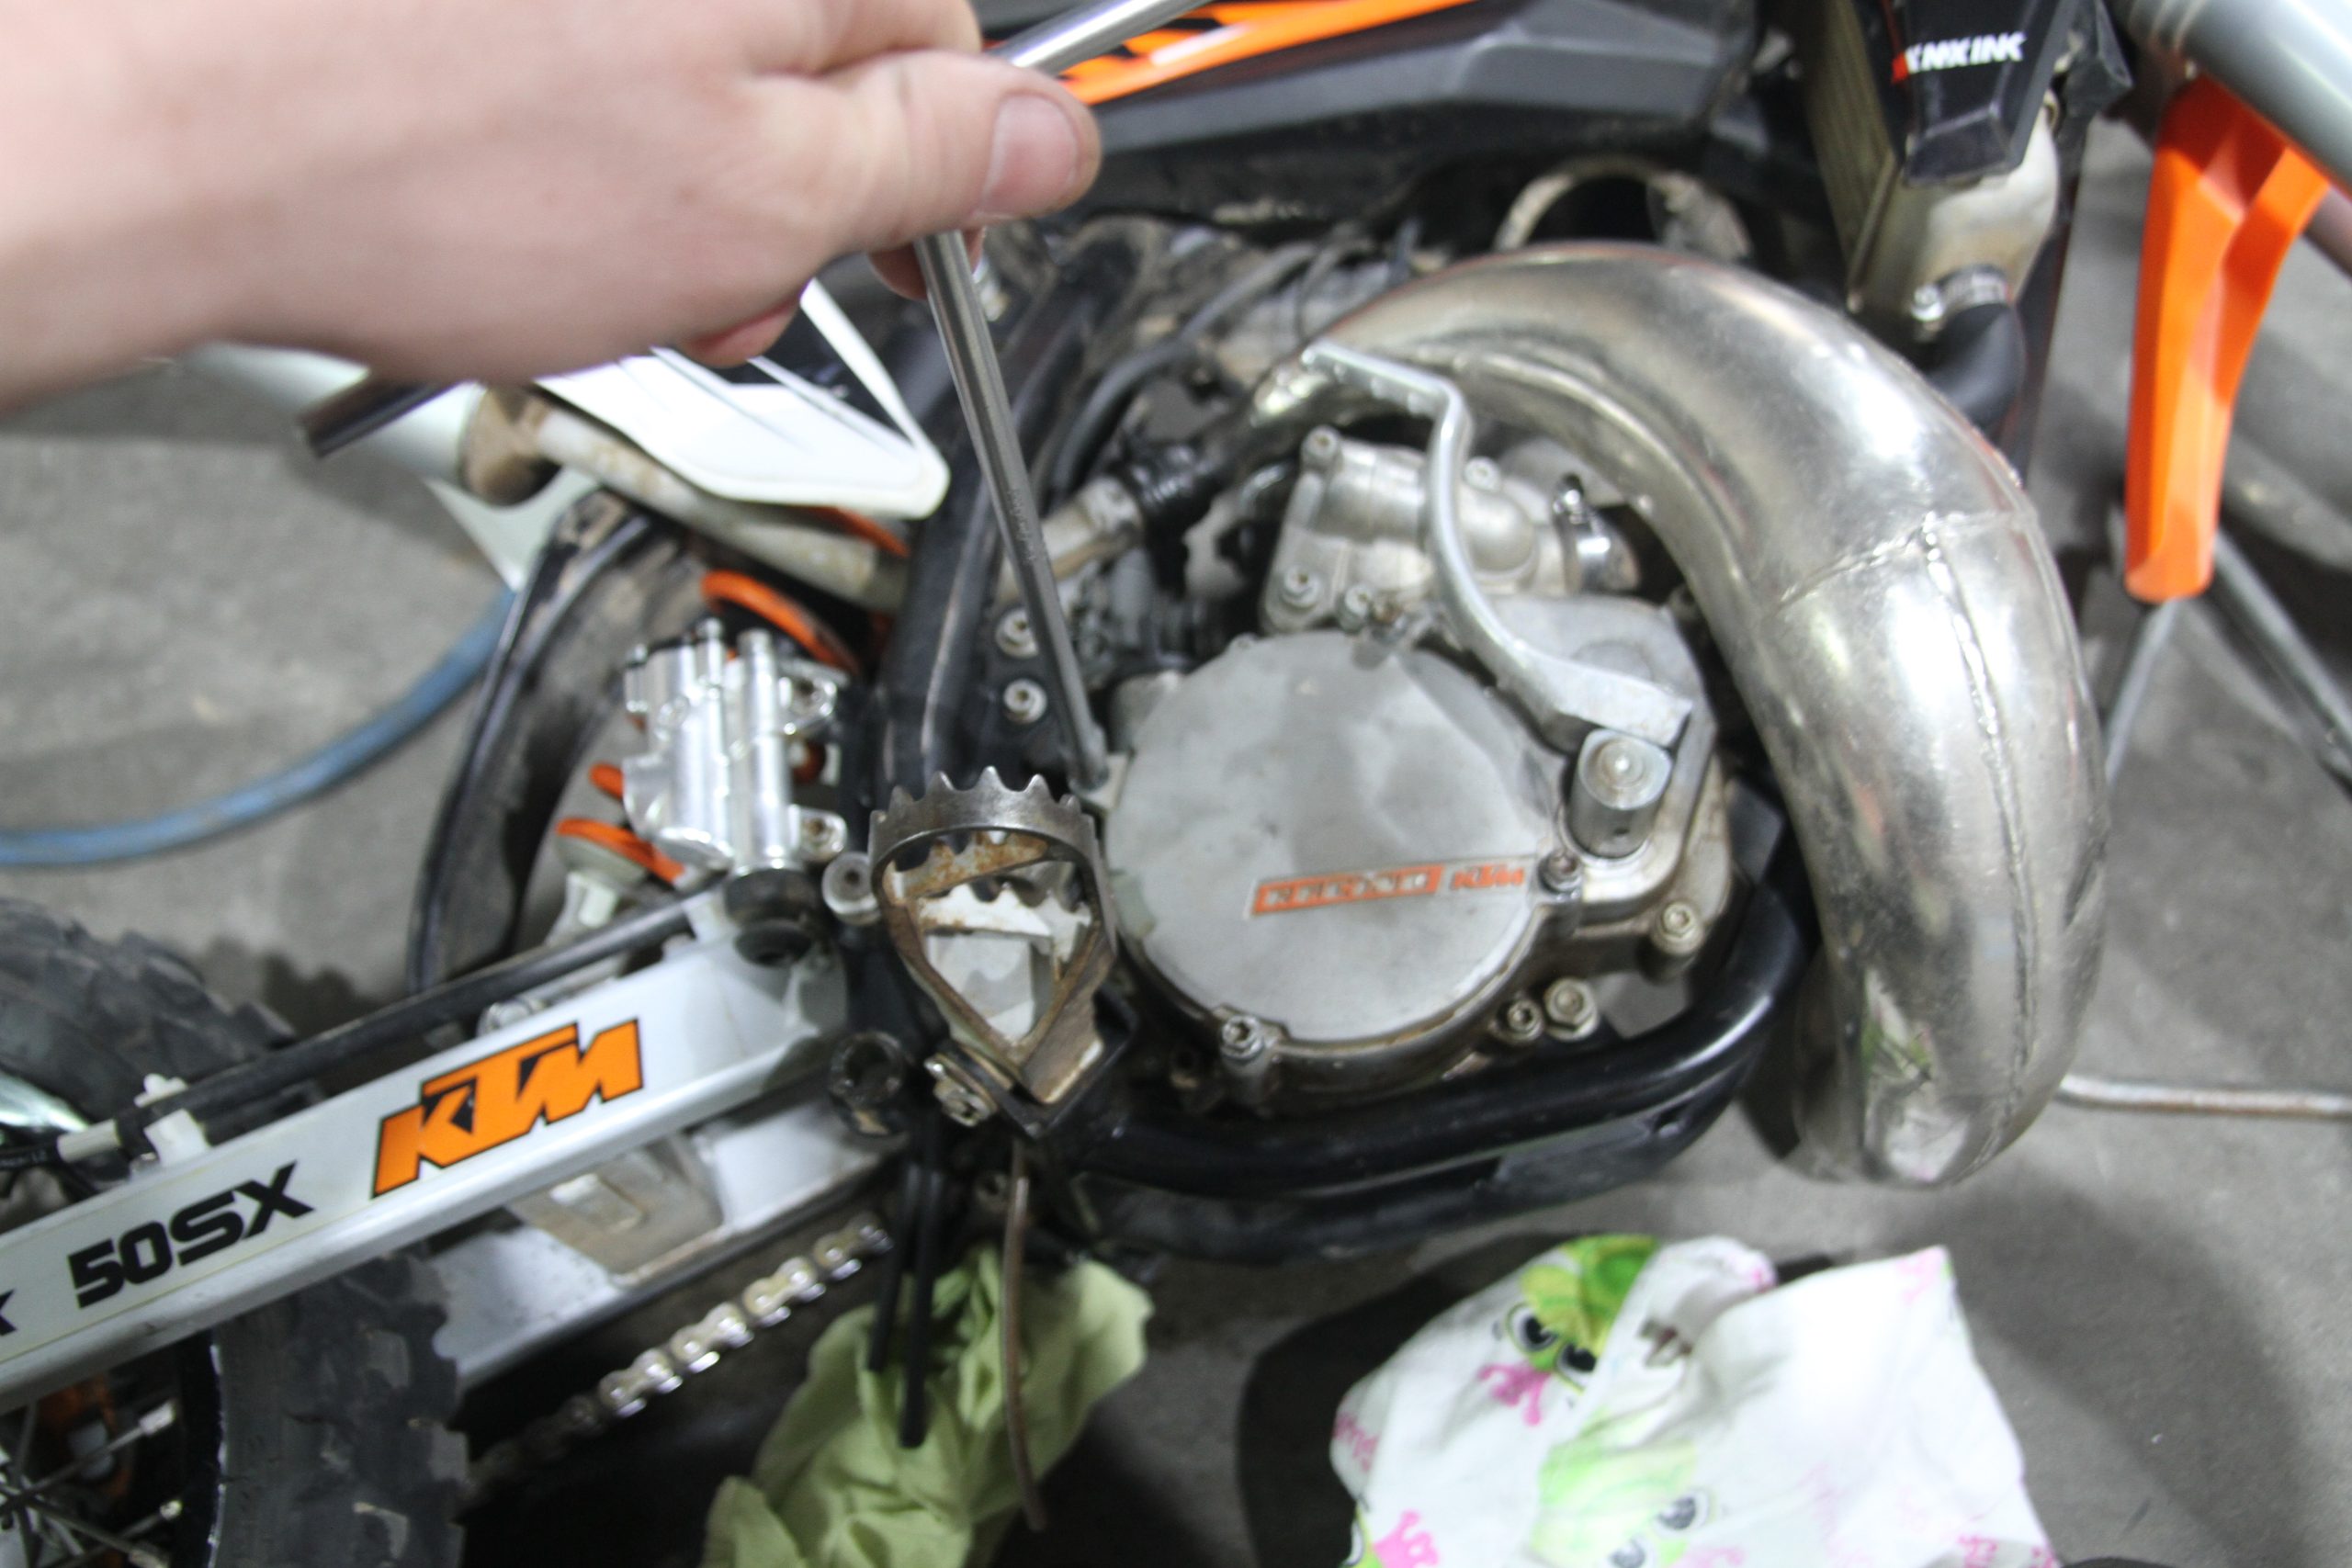
Firstly you need to secure the bike on a workstand before removing the expansion chamber. While you have the pipe off you may as well give it a clean and replace the O-rings for the header pipe.
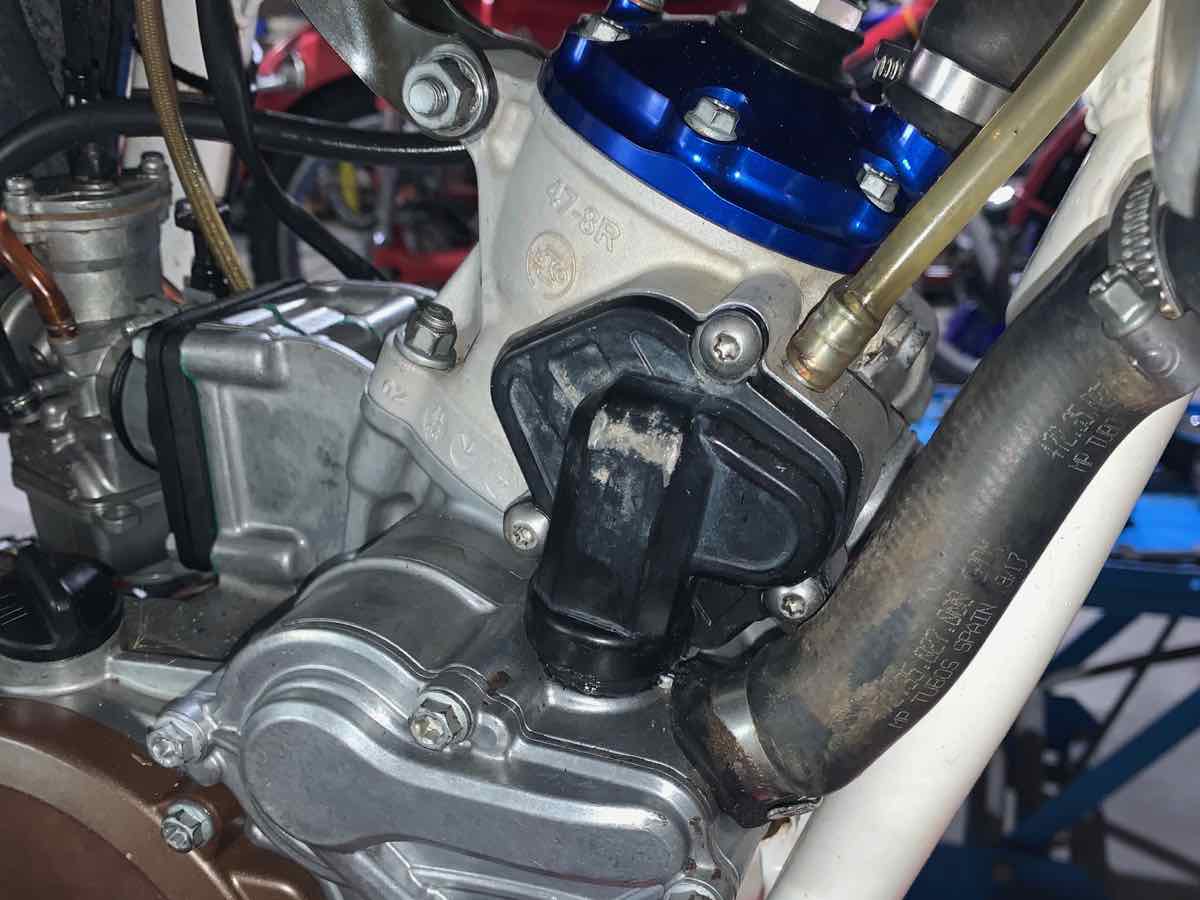
Step 2 REMOVE COVER
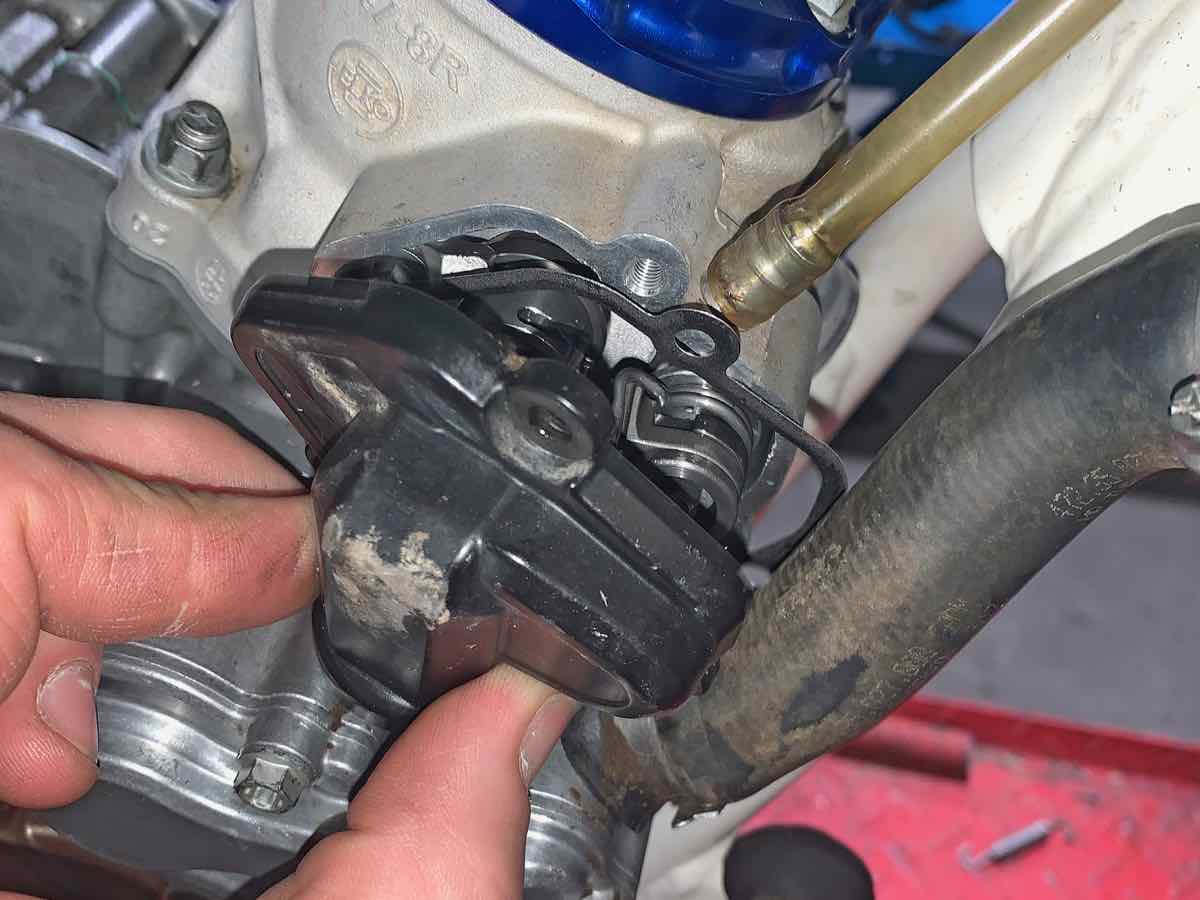
Now remove the power valve cover and discard its fibre gasket. You will then need to detach the power valve arm by removing the small retaining clip holding it. Be careful as these like to go in the crankcase if you haven’t covered the opening with a rag!
Step 3 REMOVE SEAL

Remove the three-piece seal from the top of the sidecase/clutch cover and give it a good scrub with parts cleaner, then take a rag with parts cleaner on it and clean out the seal recess in the top of the sidecase.
Step 4 FOLD IT BACK
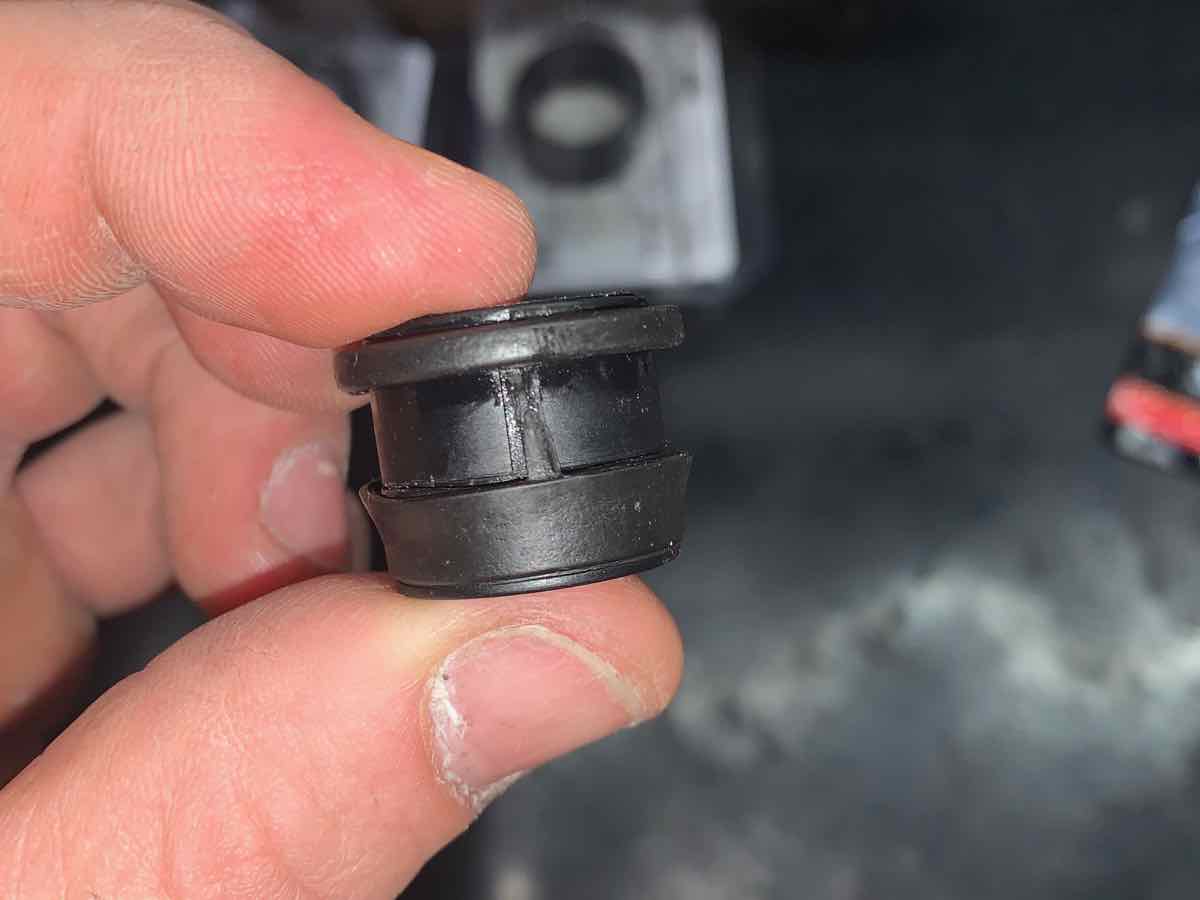
Fold back the flat rubber ring that forms a part of the three-part seal and slide a thin O-ring over the plastic tube. Push this O-ring up to the shoulder and then slide the flat rubber ring over it. This should push the top of the flat rubber ring out so that it is tapered, like a wedge, and forms a better seal against the gearbox oil.
Step 5 TAKE A BEAD
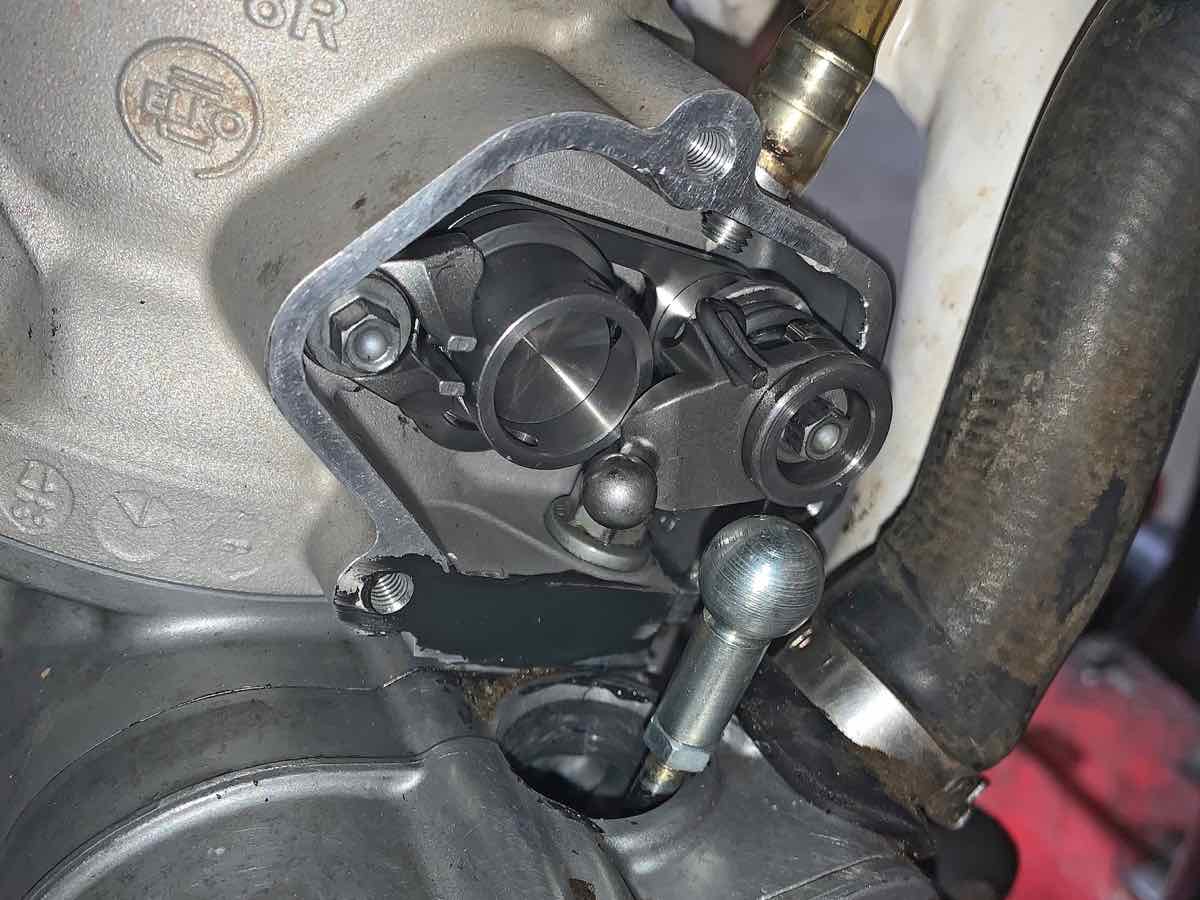
Now place a nice bead of Silastic around the square rubber base of the three-part seal and across the base of the barrel where the power valve cover sits against it.
Step 6 REFIT SEAL

Place another bead around the new fibre power valve cover gasket and sit it in place. Refit the plastic seal and reattach the power valve arm.
Step 7 SLIDE THE COVER

Now gently slide the power valve cover into place and tighten. Wipe away any excess Silastic with a clean rag.
Step 8 REFIT EXHAUST
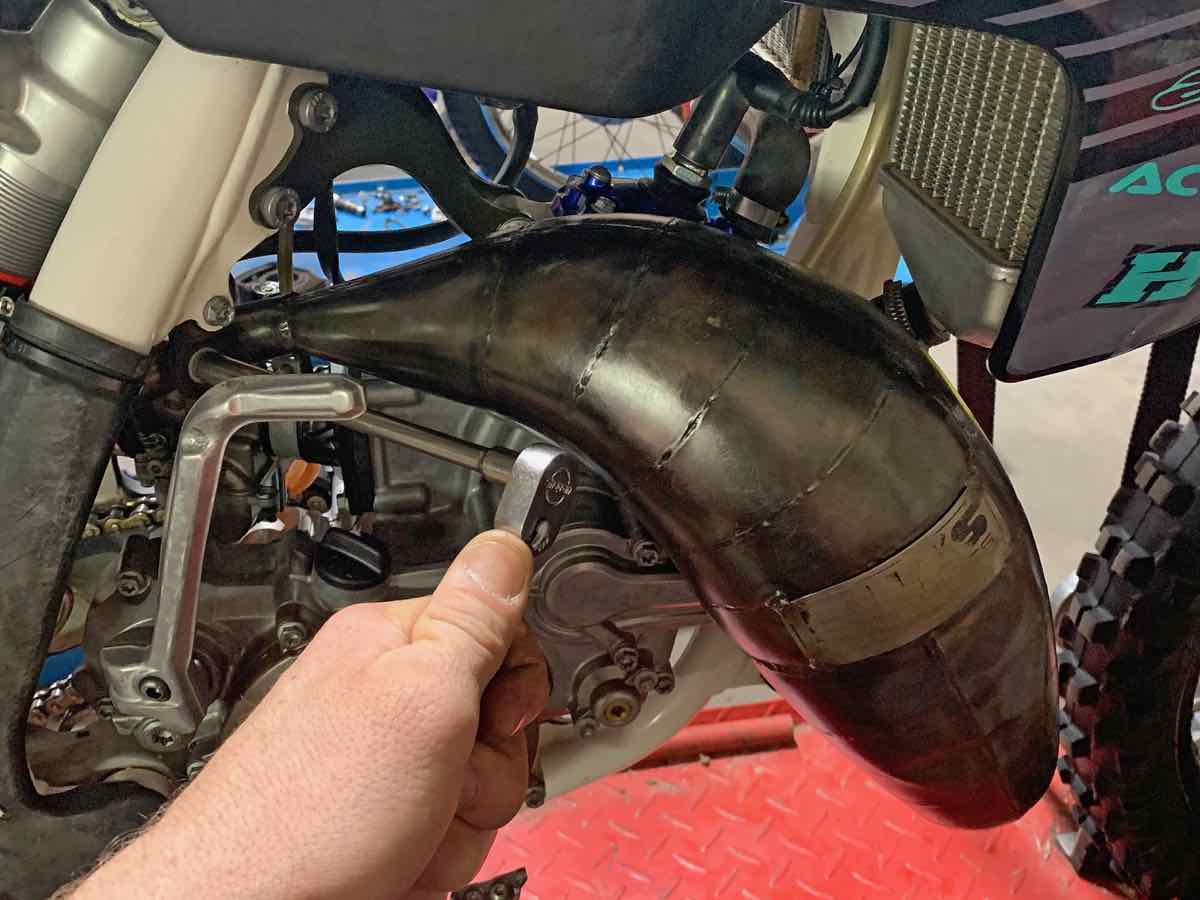
Now refit the exhaust system but give the Silastic a few hours to set before riding the bike. Technical Editor Mat Boyd
What KTM Australia Says
“For the most part, our advice is always for the customer to visit a KTM-authorised dealer. For this year’s models there have been some reports of this issue and thus the gasket between the clutch [sidecase] cover and the power-valve cover has been superseded. The 2020 model went to a one-piece gasket but the factory have now returned to the three-piece design featured on the 2018/19 models. We have found that changing to this version, or fitting two of the current power-valve-to-cylinder gaskets works well.” Conor Fraser, KTM marketing co-ordinator
BEWARE!!
If this is not done correctly and the power valve cover does not seal then you could end up with a rather large oil leak on the outside of your crankcase or contaminants getting sucked into your gearbox oil.